Pies and Tarts

Sun-Dried Tomato Quiche and a Few Fall Favorites!

Sun-Dried Tomato Quiche by Wood and Spoon blog. This is a recipe for a terrific homemade quiche. A homemade pie dough is filled with eggs, cream, and feta cheese. Italian herbs season this quiche that bakes up with parmesan and loads of flavor. This is a great meal to make ahead or reheat, even freeze! Learn how on thewoodandspoon.com

I could not be more basic. Truly, we had one evening of *slightly* chilly weather, and I am suddenly dreaming of fall. Give me tissue turtlenecks and riding boots if it means we can rid ourselves of summer heat. To celebrate the change of seasons, I have two goodies to share with you today. First, a fall shopping guide, full of a few new favorites and things I’m eyeing. Secondly, a sun-dried tomato quiche recipe from my book, Her Daily Bread. Let’s get after it!

Sun-Dried Tomato Quiche by Wood and Spoon blog. This is a recipe for a terrific homemade quiche. A homemade pie dough is filled with eggs, cream, and feta cheese. Italian herbs season this quiche that bakes up with parmesan and loads of flavor. This is a great meal to make ahead or reheat, even freeze! Learn how on thewoodandspoon.com

Fall Favorites!

  1. Organic Pima Robe Cozy up in cooler temps with these ultra-soft robes from Lake.
  2. Le Creuset Stock Pot It’s chili season! Snag this stunning pot for all your soups!
  3. Tanning Water Keep the summer glow all year long with my FAVE new facial mist.
  4. Le Labo Home Fragrance This cult-favorite scent smells rich and cozy.
  5. Champagne Bucket with Stand Celebrate the fall with a little bubbly and the prettiest bucket with stand!
  6. Ilia Serum Protect your skin throughout the fall with this lightweight serum.
  7. Wide Leg Denim Wide leg is where it’s at, and these jeans from Zara are a great price too!
  8. Her Daily Bread My first book! It contains tons of my favorite fall recipes and daily encouragement to go with it.
  9. Woven Fanny Pack Perfect for fall travels and tailgating!
  10. Botanical Bird Plates I think these autumnal bird plates and classic and charming!
  11. Cordless Lamps Light up your fall gatherings with these luxe cordless touch lamps with adjustable lighting!
  12. Suede Western Boots I’m told western is in- these boots from Madewell are the perfect tone for fall!
Sun-Dried Tomato Quiche by Wood and Spoon blog. This is a recipe for a terrific homemade quiche. A homemade pie dough is filled with eggs, cream, and feta cheese. Italian herbs season this quiche that bakes up with parmesan and loads of flavor. This is a great meal to make ahead or reheat, even freeze! Learn how on thewoodandspoon.com

Sun-Dried Tomato Quiche

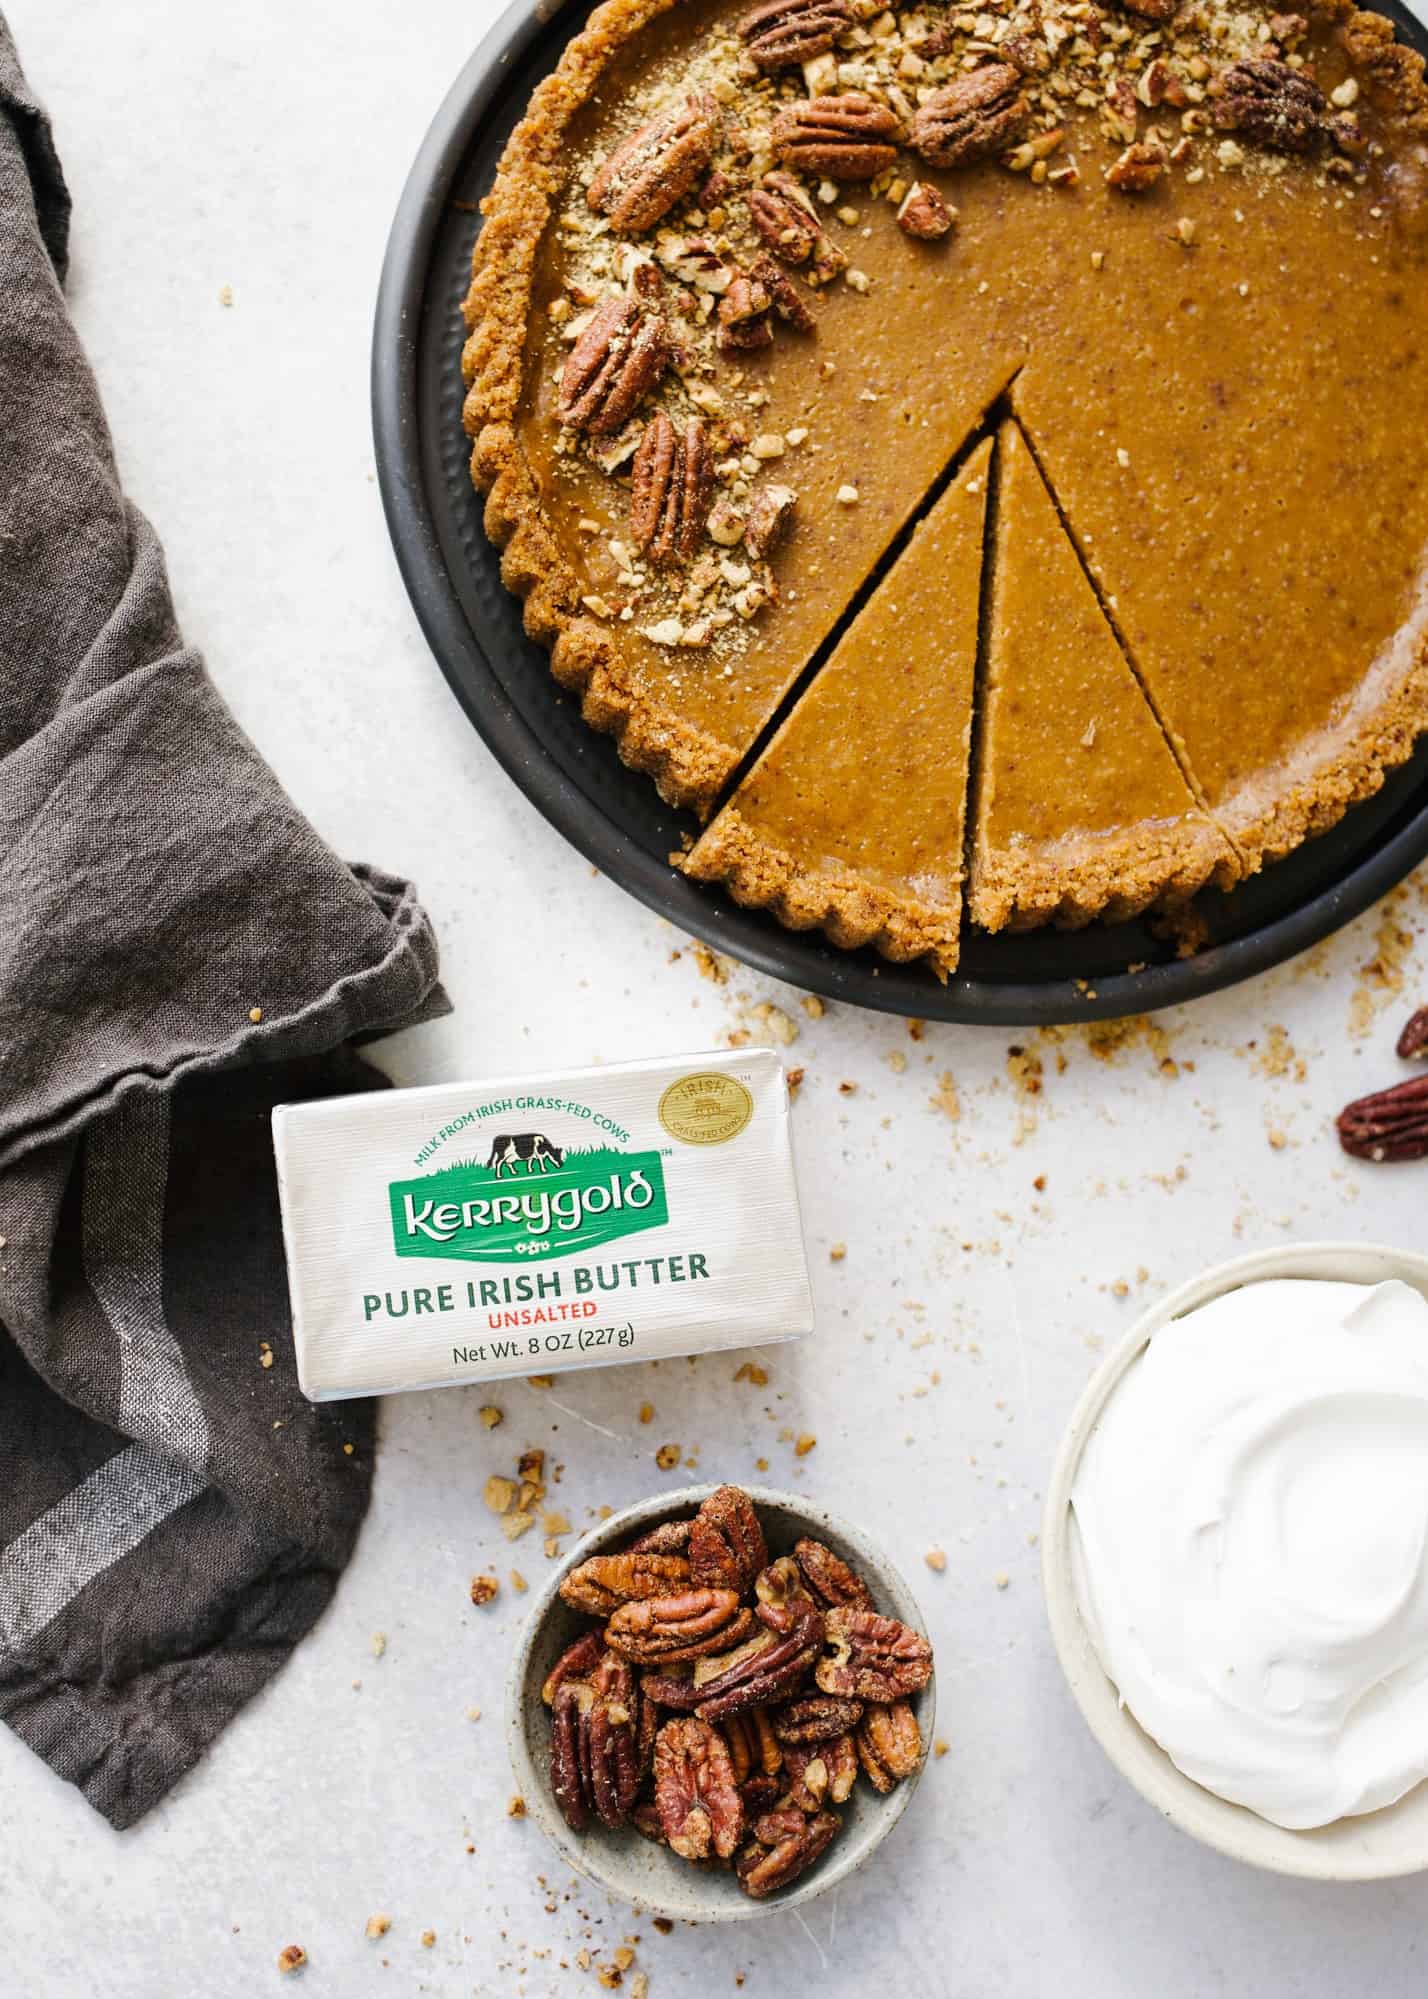
This recipe for sun-dried tomato quiche is from my first book, Her Daily Bread. (If you haven’t checked it out already, please do!) The recipe was inspired by my sister. A number of years ago, she asked a waiter what the “kweesh” of the day was. Even though she was maybe 12 at the time, I have not let her live it down since. Sorry, Cheney.

I adore the flavors of this sun-dried tomato quiche, so much so, that I made it for a brunch last weekend! I think it makes the perfect vegetarian option for any breakfast or brunch, but it’s rich enough to enjoy whenever. Flavored with feta, parmesan, and Italian herbs, this quiche is perfect anytime of the year, truly.
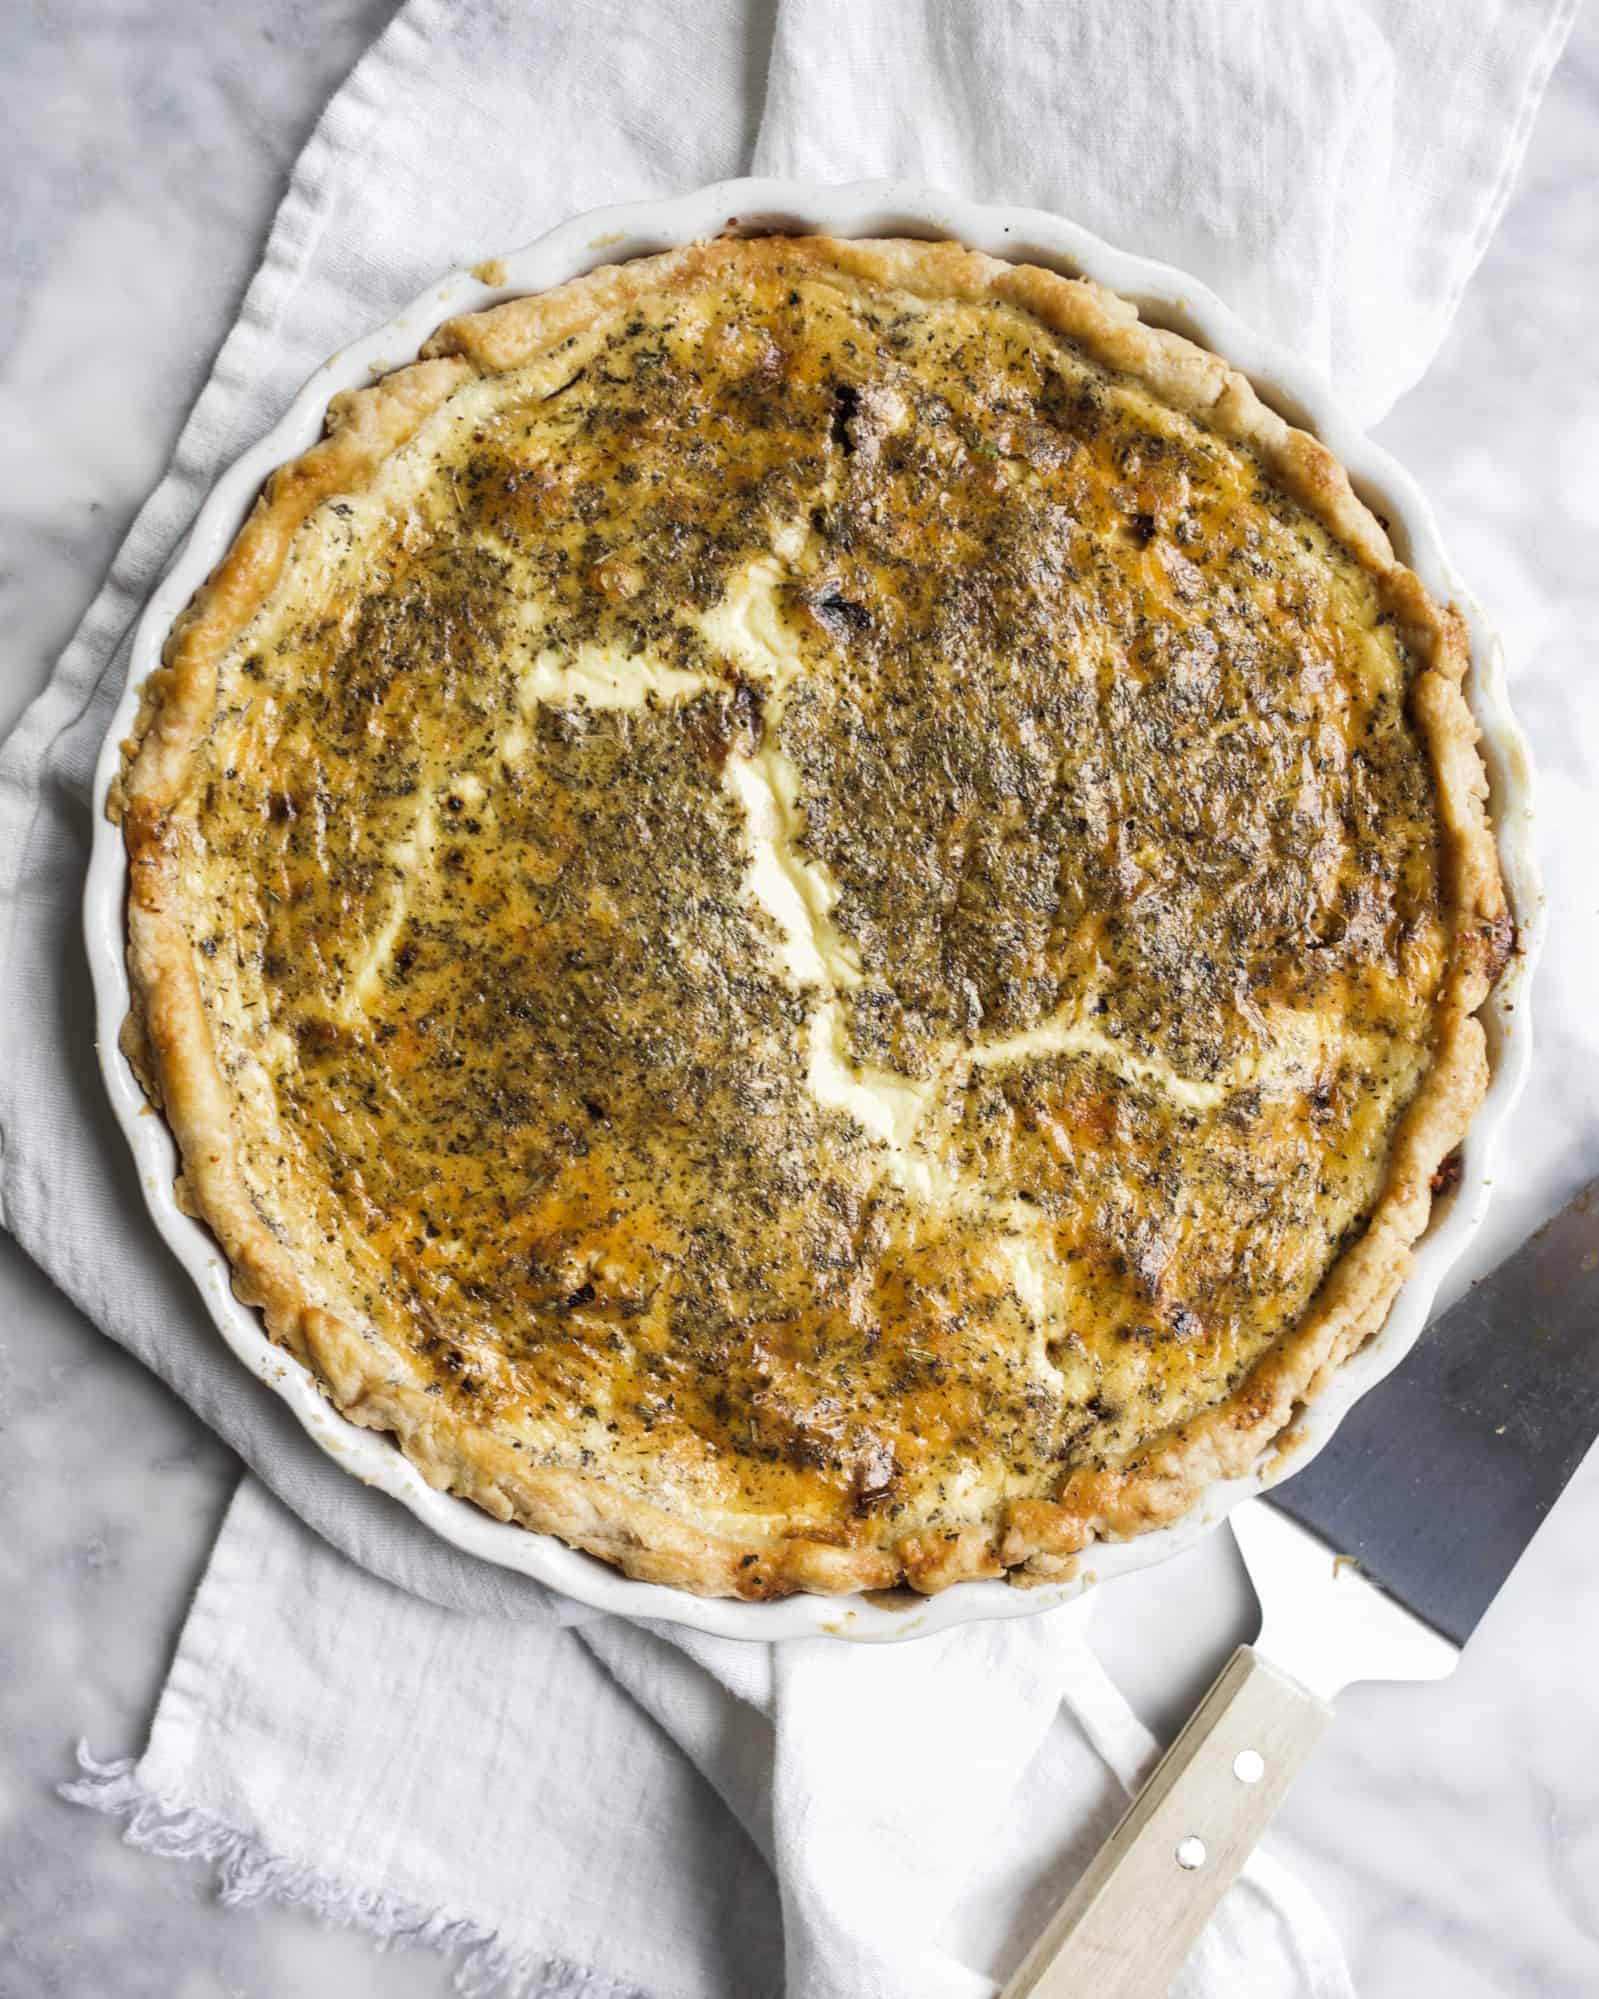
Sun-Dried Tomato Quiche by Wood and Spoon blog. This is a recipe for a terrific homemade quiche. A homemade pie dough is filled with eggs, cream, and feta cheese. Italian herbs season this quiche that bakes up with parmesan and loads of flavor. This is a great meal to make ahead or reheat, even freeze! Learn how on thewoodandspoon.com

Making the Quiche

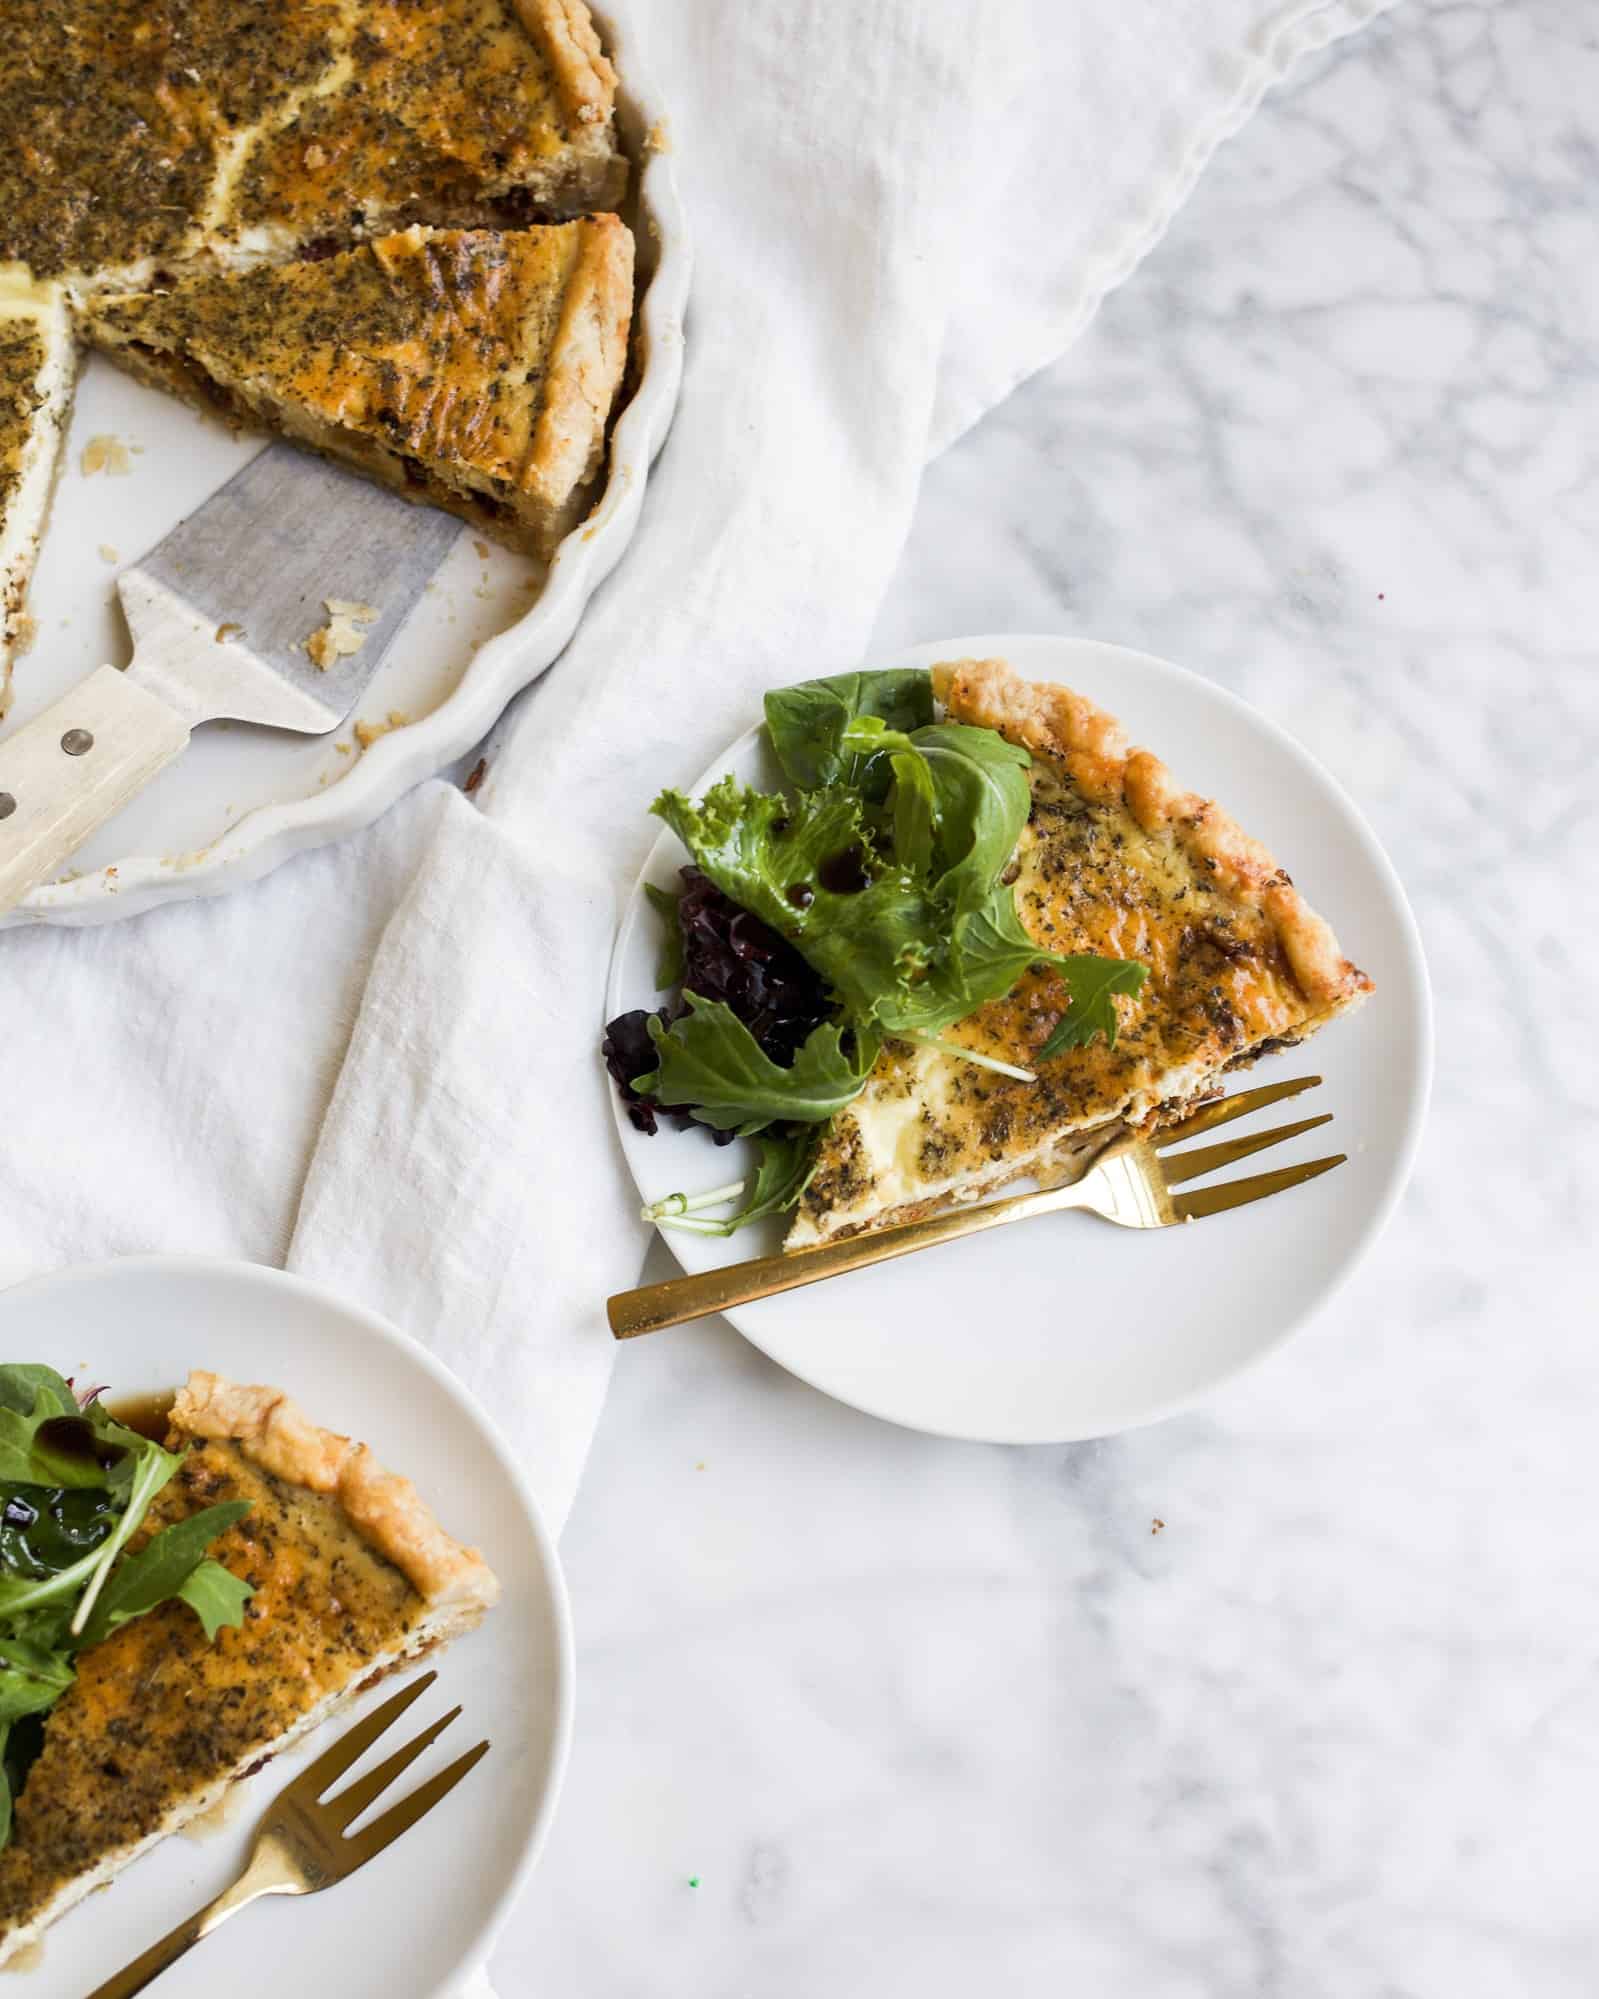
To make this quiche, we start with the crust. Here, I use my favorite pie crust. You can read all about my best tips on making homemade pie doughs here! Once par-baked, the remaining ingredients come together in a single bowl. Half and half, whole eggs, and herbs pour over the cheese and diced tomatoes. After a good bake, the slices are ready for enjoying.

Sun-Dried Tomato Quiche by Wood and Spoon blog. This is a recipe for a terrific homemade quiche. A homemade pie dough is filled with eggs, cream, and feta cheese. Italian herbs season this quiche that bakes up with parmesan and loads of flavor. This is a great meal to make ahead or reheat, even freeze! Learn how on thewoodandspoon.com

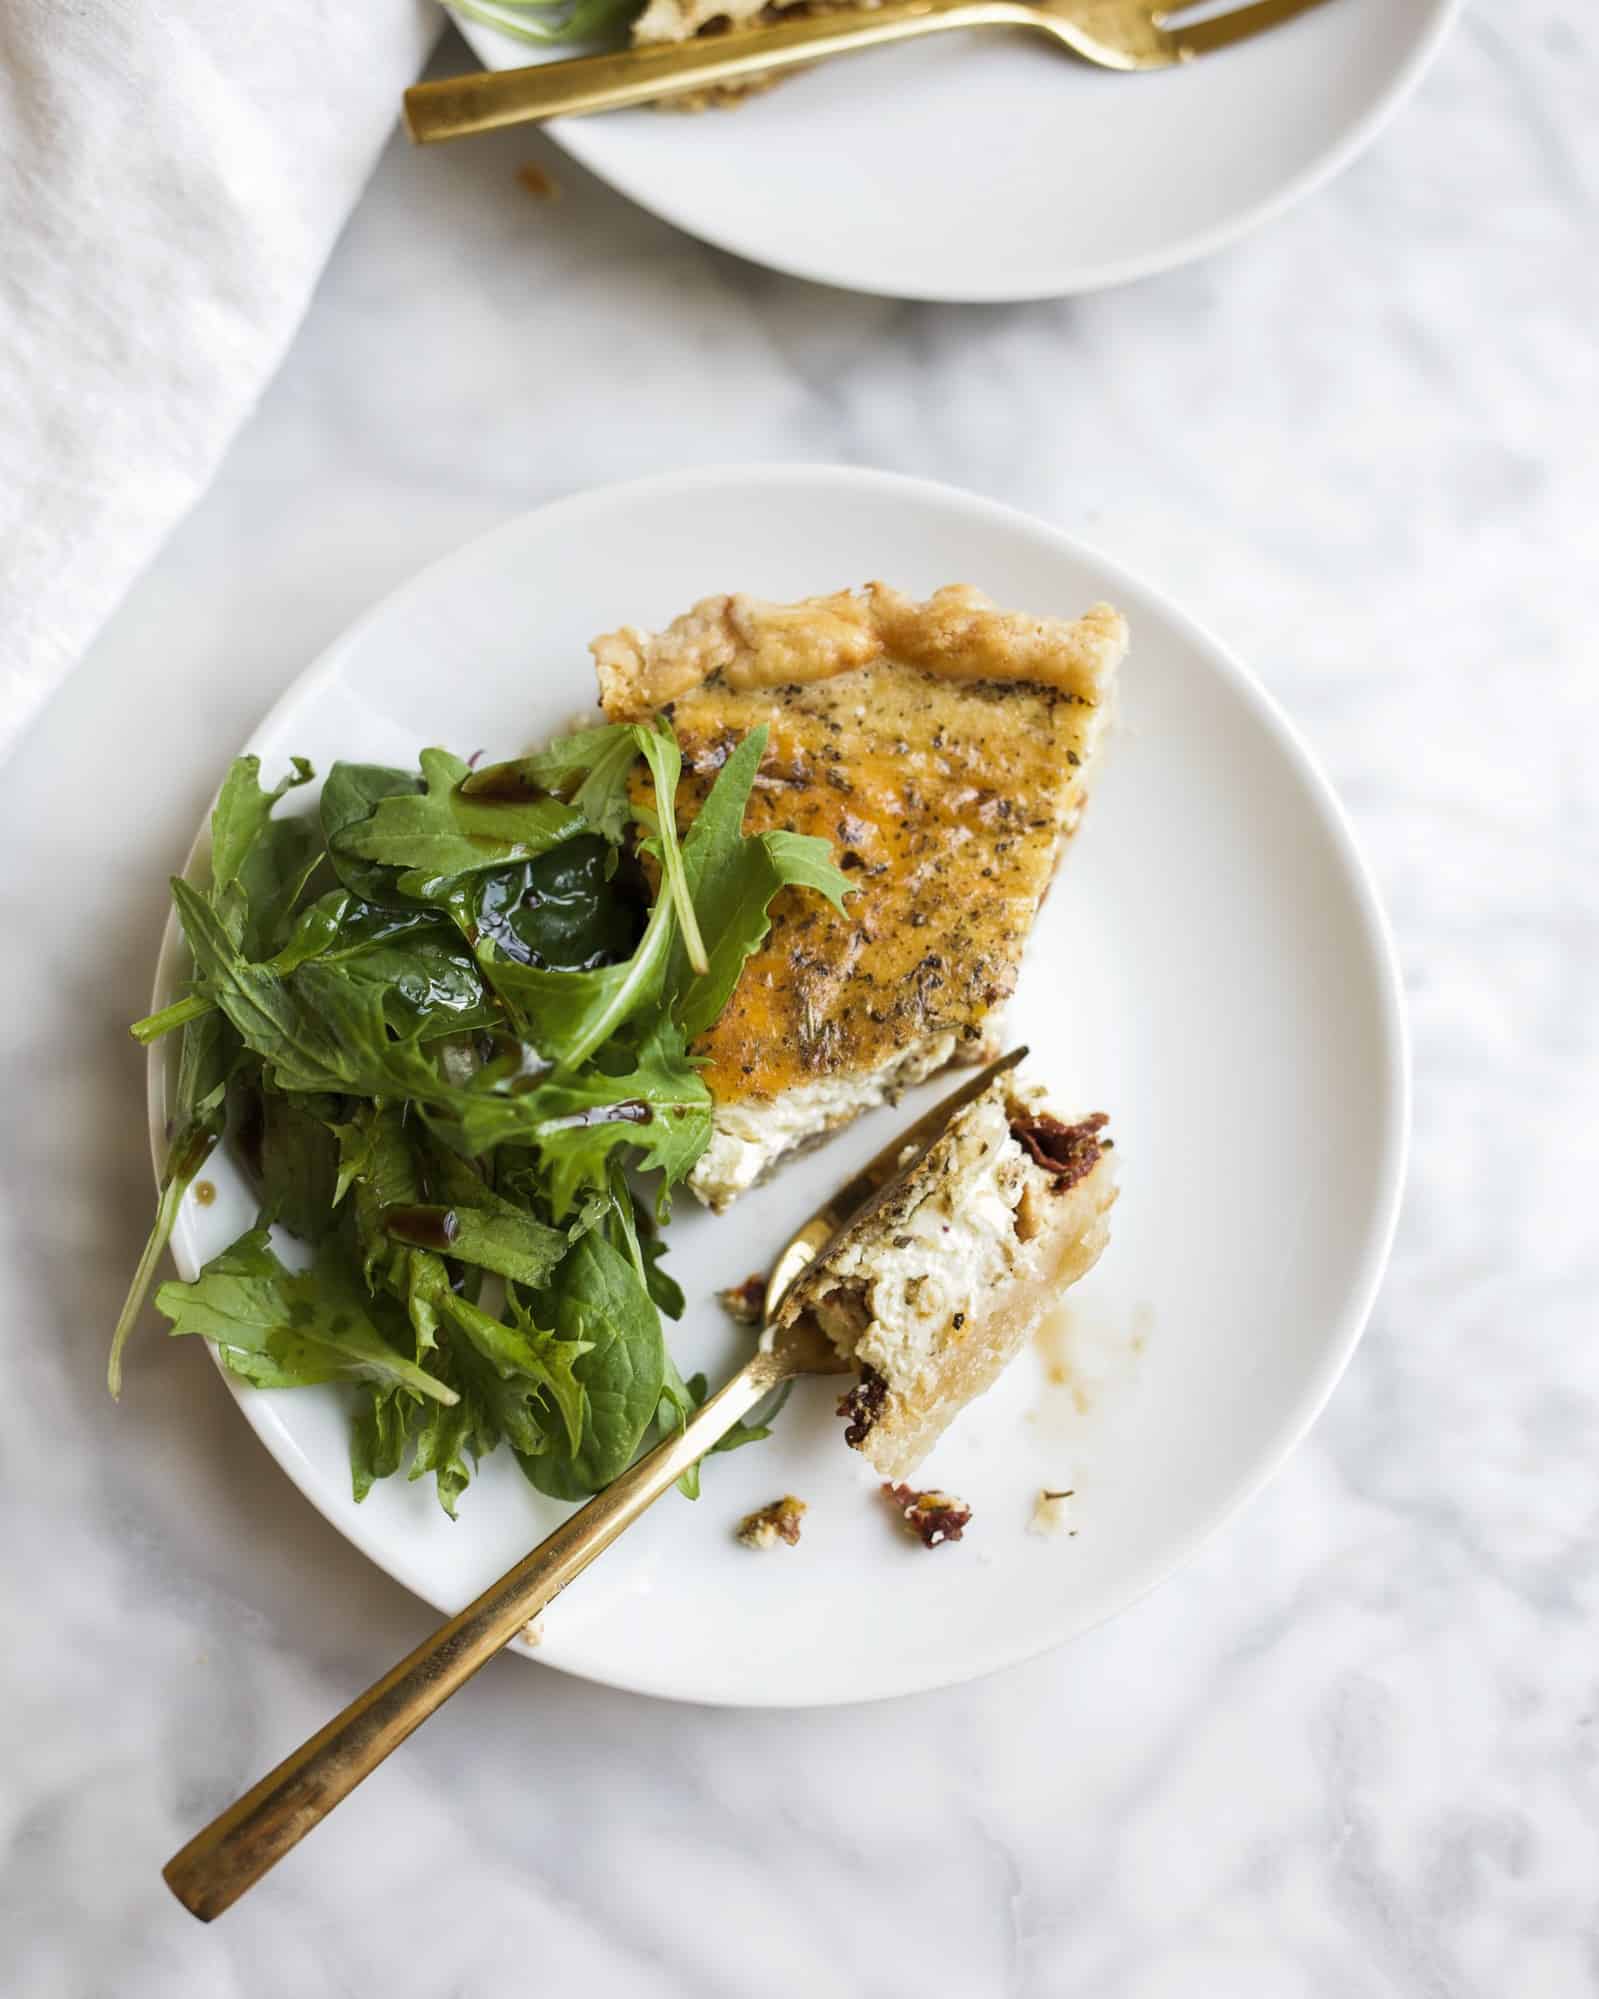
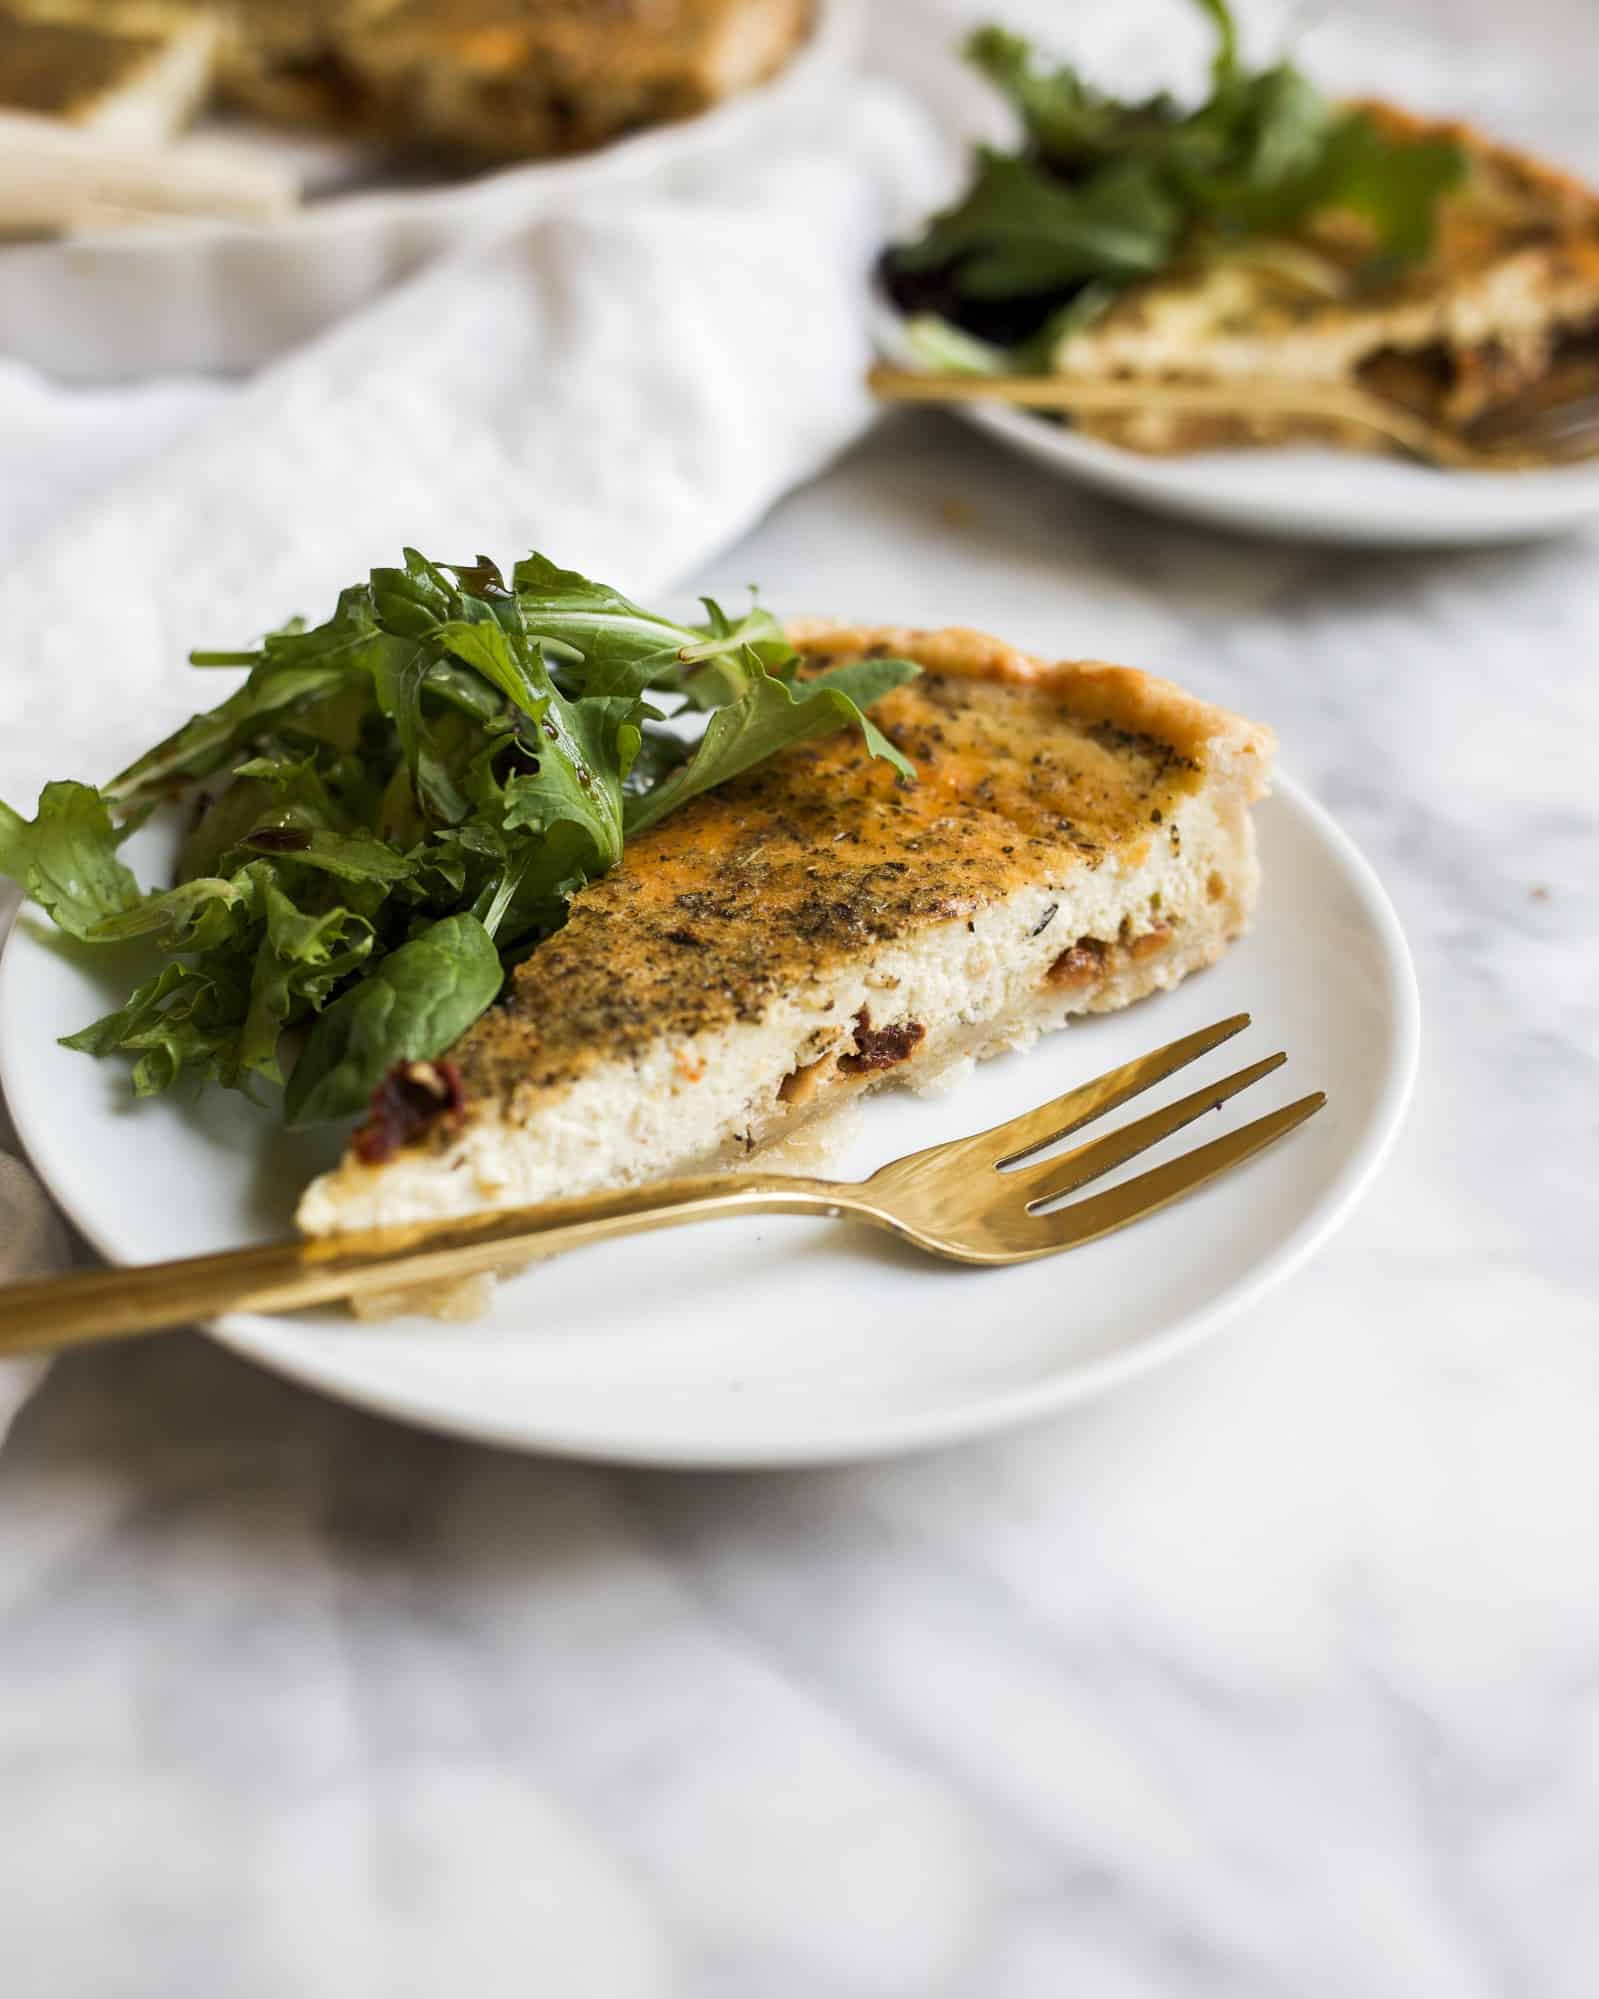
What to Serve with Quiche

I like the serve quiche slices warm with a mixed green salad. This one tastes terrific with a sweet balsamic vinegar and olive oil dressing. Quiche also makes a great accompaniment to soup or a stand-alone dish to serve with various brunch options. The best thing about quiche is that it’s flexible on temperature. Served hot or every just room temperature, it tastes good either way.

Give the sun-dried tomato quiche a try and let me know what you think! Happy baking and happy shopping!

Sun-Dried Tomato Quiche by Wood and Spoon blog. This is a recipe for a terrific homemade quiche. A homemade pie dough is filled with eggs, cream, and feta cheese. Italian herbs season this quiche that bakes up with parmesan and loads of flavor. This is a great meal to make ahead or reheat, even freeze! Learn how on thewoodandspoon.com

If you like this sun-dried tomato quiche you should try:

Roasted Summer Vegetable Quiche
Kale, Swiss, and Sausage Quiche
Tomato Pie
Sausage Kale Pinwheels

Print

Sun-Dried Tomato Quiche and a Few Fall Favorites!

This sun-dried tomato quiche is flavored with feta and parmesan cheese, Italian herbs, and a buttery pie crust!

  • Author: Kate Wood
  • Prep Time: 15
  • Cook Time: 45
  • Total Time: 1 hour
  • Yield: 9 servings
  • Category: Brunch

Ingredients

For the pie dough:

  • 13/4 cups all-purpose flour
  • 2 teaspoons sugar
  • 1/4 teaspoon salt
  • 5 tablespoons chilled solid vegetable shortening, cut into pieces
  • 6 tablespoons chilled unsalted butter, cut into pieces
  • Approximately 5 tablespoons ice cold water
  • 1 large egg 

For the quiche:

  • 1 tablespoon butter
  • ½ cup chopped yellow onion (about ½ of one medium onion)
  • 2 cloves of garlic, minced
  • 2 cups (480 gm) half and half
  • 3 large eggs
  • ½ cup grated parmesan cheese
  • 1 teaspoon Italian seasoning
  • ½ teaspoon dried basil
  • ¾ teaspoon salt
  • ½ teaspoon pepper
  • ½ cup oil-packed sun-dried tomatoes, drained and chopped
  • ¼ cup crumbled feta cheese

Instructions

To make the pie dough:

  1. Whiz the flour, sugar, and salt in a food processor to combine (Note: you can also do this by hand with a pastry cutter!) Pulse in the shortening and butter, just until evenly dispersed with pea-sized clumps throughout. Begin adding ice water 2 tablespoons at a time until moist clumps begin to form. Remove dough from food processor, form it into a flat round disk, and wrap in plastic wrap. Chill in the fridge for at least an hour prior to use.

To prep the quiche:

  1. Preheat the oven to 375 degrees. Use a floured rolling pin to roll the dough out onto a floured work surface into a round of dough about an inch and a half wider on all sides than a shallow 9” tart dish. Roll the dough back onto the rolling pin and the transfer it to the dish, unrolling as you go. Gently work the dough into the edges of the dish and trim off any excess dough, leaving about an inch of excess hanging on all sides.  Fold the dough under itself and gently crimp the edges into the dish, allowing the top of the dough to extend about ¾-1” above the lip of the dish. This will help keep your crust tall even after baking. If your dough has gotten soft or warm while rolling it out, place it in the freezer for 5-10 minutes to chill up again. 
  2. When ready to bake, prepare your egg wash by whisking the remaining egg from the pie dough with a teaspoon of water. Place a crinkled sheet of parchment paper into the bottom of the crust and fill it with pie weights or uncooked dry beans. Bake in the preheated oven about 10 minutes, then remove the paper and weights, brush the entire crust with a thin layer of the egg wash, and bake for an additional 15 minutes, or until the bottom of the crust doesn’t look too wet and soggy. While the crust is baking, begin to assemble your filling.
  3. In a small fry pan, heat the butter until melted and then cook the onion over medium heat, stirring regularly, until softened and translucent. Add the garlic and cook for an additional minute. Remove from heat and set aside. 
  4. Whisk together the half and half, eggs, parmesan, Italian seasoning, basil, salt and pepper. When the crust is finished baking, spread the cooked onion mixture on top of the crust and evenly spread out the sundried tomatoes and feta. Carefully pour the egg mixture into the dish, being careful to not overflow the tart. Bake in the preheated oven for about 35 minutes or until the top is golden and the center is no longer jiggly. Serve warm or reheat individual slices in the toaster oven!

Did you make this recipe?

Share a photo and tag us — we can’t wait to see what you’ve made!

Strawberry Rhubarb Crisp

Strawberry Rhubarb Crisp by Wood and Spoon blog. This is a simple fresh summer fruit crisp made in a cast-iron skillet and served with vanilla ice cream. Oats, brown sugar, and butter make up the crumble topping of this potluck dessert that serves a crowd. Learn how to make this yummy fruit dessert and how to use rhubarb on thewoodandspoon.com.

This is it! The last week before summer. It’s been 10 weeks of swimming and road trips, popsicles, and rainy movie days, but we are ready for a change of pace. Anyone else totally out of gas after this season?

I think a lot of us felt the need to be on the go. After all, the past few years have found many of us homebound. Now, with reopening borders and dusty passports, it’s as if the whole world is asking, “Where to next?” If the highways and airports are any indication, we are all just dying to go anywhere.

Strawberry Rhubarb Crisp by Wood and Spoon blog. This is a simple fresh summer fruit crisp made in a cast-iron skillet and served with vanilla ice cream. Oats, brown sugar, and butter make up the crumble topping of this potluck dessert that serves a crowd. Learn how to make this yummy fruit dessert and how to use rhubarb on thewoodandspoon.com.

So that’s what we did. We were fortunate to go all sorts of places this summer, and, hear me out, it was definitely fun. But now, finally home and with my suitcase back in it’s proper place (as opposed to open and half-full on the floor of my closet), I kinda want to just be. I want to stay in one place long enough to fill up on the emotional, physical, and mental clarity that, honestly, I’m lacking. Anyone else in this boat with me?

“Bloom where you’re planted.”

I’ve shared this before, but I think it’s worth repeating. “Bloom where you’re planted.” That means thrive, dig your roots deep, and grow wherever you find yourself planted. I sense that I’ve missed out on some of the goodness in our backyard, and I don’t want to anymore. I want to bloom more fully here.

Strawberry Rhubarb Crisp by Wood and Spoon blog. This is a simple fresh summer fruit crisp made in a cast-iron skillet and served with vanilla ice cream. Oats, brown sugar, and butter make up the crumble topping of this potluck dessert that serves a crowd. Learn how to make this yummy fruit dessert and how to use rhubarb on thewoodandspoon.com.

Strawberry Rhubarb Crisp

This strawberry rhubarb crisp is evidence of the good things home has to offer. I picked these strawberries earlier this season and ended up freezing most of them because we were planning to be out of town. Now, at the end of the summer, I have extra produce on hand to make magic with. Better late than never, right?

This strawberry rhubarb crisp reminds me of one of my favorites pies. Several years ago, I posted a strawberry rhubarb pie, and it’s still the bomb. But since pies often take a little more work than I care to offer, a crisp seemed like a good alternative. And with all that oat and brown sugar crumble, taking the easy road has never tasted so good.

Making the Strawberry Rhubarb Crisp

To make this strawberry rhubarb crisp, we start with the crumble. First, brown sugar, butter, flour, and oats toss together with a little bit of cinnamon. The sliced strawberries and rhubarb get a sprinkle of sugar and the two components layer together in a pan. I opted to use a cast-iron skillet, but you could use a baking dish if you prefer. Bake the dish in the preheated oven until the juice are bubbling throughout. Oh, and don’t forget to serve it with ice cream.

I hope you stay put long enough to get busy in the kitchen with this recipe. If you get to try it, let me know what you think! Happy Thursday and happy baking!

If you like this strawberry rhubarb crisp you should try:

Strawberry Rhubarb Pie
Raspberry Rhubarb Crumb Cake
Strawberry Rhubarb Crumb Bars
Rhubarb Pop-Tarts
Strawberry Rhubarb Layer Cake

Print

Strawberry Rhubarb Crisp

This strawberry rhubarb crisp features fresh fruit and a brown sugar oat crisp on top. It tastes terrific topped with vanilla ice cream!

  • Author: Kate Wood
  • Prep Time: 5
  • Cook Time: 45
  • Total Time: 50 minutes
  • Yield: 8 Servings

Ingredients

  • 1 cup light brown sugar, packed,
  • 1 cup old fashioned oats
  • ½ cup all-purpose flour
  • 2 teaspoons cinnamon, divided
  • ½ cup unsalted butter, melted
  • 1 cup sugar
  • 3 tablespoons cornstarch
  • ½ teaspoon salt
  • 4 cups sliced rhubarb
  • 4 cups chopped strawberries

Instructions

  1. Preheat the oven to 350 degrees Fahrenheit.
  2. In a medium bowl, stir to combine to brown sugar, oats, four, and 1 teaspoon of cinnamon. Stir in the butter just until combined and set aside.
  3. In a large bowl, combine the remaining cinnamon, sugar, cornstarch, and salt. Toss in the sliced rhubarb and strawberries. Pour the fruit mixture into a 9” cast-iron skillet or baking dish and top with crumbled bits of the oat mixture. Bake in the preheated oven for about 45-50 minutes or until the fruit is bubbling slightly throughout the entire skillet. Allow to cool slightly before serving with scoops of ice cream or whipped cream.

Did you make this recipe?

Share a photo and tag us — we can’t wait to see what you’ve made!

Berry Buckle

Berry Buckle by Wood and Spoon blog. This is a simple breakfast cake / dessert dotted with summer blackberries and blueberries and topped with an almond streusel. The cake bakes up well and is delicious served with whipped cream and ice cream. Learn how simple the recipe is at woodandspoon.com

Before I moved to the South, I didn’t know a thing about Southern hospitality. In my mind, hospitality was something reserved for the hotel industry and Martha Stewart. What could the word possibly mean outside of those two instances? In the 15+ years since that I’ve lived in the Deep South, I’ve slowly gotten to tiptoe in to warmth that is Southern hospitality, and I gotta say, it feels good. The kindness, the intentionality, and the service of it feels like living and breathing love. There’s nothing like it.

Berry Buckle by Wood and Spoon blog. This is a simple breakfast cake / dessert dotted with summer blackberries and blueberries and topped with an almond streusel. The cake bakes up well and is delicious served with whipped cream and ice cream. Learn how simple the recipe is at woodandspoon.com

Just yesterday, Charlie’s daycare teacher offered to share some blueberries she had picked from the bushes on her property. A few hours later, she showed up at my door with a 12-gallon storage bin filled to the brim with hand-picked summer produce. No charge, no request for anything in return, just an offer from a friend who knew my baby loved blueberries. I spent the next few minutes filling bags with berries to share with my friends and tried not to get teary-eyed over the obvious symbolism that was playing out right in front of me. I was reminded that when we love others, whether via blueberries, our words, our actions, or some other form of hospitality, that love almost always gets passed on and affects so many more people that we initially imagined. It multiplies and grows.

Berry Buckle by Wood and Spoon blog. This is a simple breakfast cake / dessert dotted with summer blackberries and blueberries and topped with an almond streusel. The cake bakes up well and is delicious served with whipped cream and ice cream. Learn how simple the recipe is at woodandspoon.com

“Love is the flower you’ve got to let grow.” -John Lennon

I’d like to be a person that grows love. The hospitality and generosity I received in that bin of blueberries reminds me that that every little thing can make a difference, and those simple offerings of kindness rarely affect just the person we’re sharing them with. They make a difference, and the world needs more of that love. So today (or sometime in the future!), when you have the opportunity to give generously yourself and your resources, I hope you’ll remember that hospitality isn’t a job set aside for a select few- it’s an opportunity for us all.

Berry Buckle by Wood and Spoon blog. This is a simple breakfast cake / dessert dotted with summer blackberries and blueberries and topped with an almond streusel. The cake bakes up well and is delicious served with whipped cream and ice cream. Learn how simple the recipe is at woodandspoon.com

Blueberry Buckle

Now that I have blueberries, I’m looking forward to recipes that will honor the fruit in a way it deserves. This berry buckle is so simple that I think you’ll like it too. This vanilla and almond-scented buttermilk cake has fresh berries and a simple and buttery almond streusel on top. The end result is a cake that is equal parts breakfast and dessert, which we all know is my very favorite thing to make. Served with a dollop of whipped cream or simply a cup of coffee, this berry buckle is definitely the perfect treat to make this summer. Let me tell you how.

Berry Buckle by Wood and Spoon blog. This is a simple breakfast cake / dessert dotted with summer blackberries and blueberries and topped with an almond streusel. The cake bakes up well and is delicious served with whipped cream and ice cream. Learn how simple the recipe is at woodandspoon.com

To make this berry buckle, we start by creaming butter and sugar together until it’s pale and fluffy. A single eggs and extract come next followed by buttermilk and a few simple dry ingredients. Spread the batter into an 8″ or 9″ pan and then dotted with fresh berries- any of your favorites will do. Bake the cake partially before being sprinkling the top with the almond streusel.

After baking, this berry buckle tastes terrific served warm with ice cream or even on its own. If you happen to have some ripe summer produce on hand, this is definitely a terrible option for utilizing it. Give the recipe a try and let me know what you think! Happy Wednesday and Happy Baking!

If you like the berry buckle you should try:

Blueberry Lemon Pound Cake
Blueberry Sour Cream Pie
Whole Wheat Blueberry Muffins
Blueberry Cornbread
Strawberry Almond Skillet Cake

Print

Berry Buckle

This berry buckle is a moist buttermilk cake dotted with fresh summer berries and a simple almond streusel!

  • Author: Kate Wood
  • Prep Time: 10
  • Cook Time: 30
  • Total Time: 40 minutes
  • Yield: 9 Servings
  • Category: Dessert

Ingredients

For the streusel:

  • 3 tablespoons all-purpose flour
  • 2 tablespoons sugar
  • 2 tablespoons unsalted butter at room temperature
  • ¼ cup sliced or chopped almonds

For the cake:

  • 1/4 cup (55 gm) unsalted butter, at room temperature
  • ¾ cup (150 gm) sugar
  • 3/4 teaspoon vanilla
  • ½ teaspoon almond extract
  • 1 large egg, at room temperature
  • 11/4 cups (150 gm) all-purpose flour
  • ½ teaspoon baking powder
  • ¼ teaspoon baking soda
  • ½ teaspoon salt
  • ½ cup (120 gm) buttermilk
  • 11/2 cups mixed berries (I used 1 cup blackberries and ½ cup blueberries)

Instructions

To prepare the streusel:

  1. Stir to combine the flour and sugar. Use the back of a fork to cut the softened butter into the dry ingredients until it is incorporated in pea-sized crumbs. Toss in the almonds and set aside.

To prepare the cake:

  1. Preheat the oven to 375 degrees. Grease a 10” cast iron skillet and set aside.
  2. In the bowl of a stand mixer or in a large mixing bowl, cream together the butter and ¾ cup sugar on medium speed until light and fluffy, about 2 minutes. Add the vanilla, almond extract, and egg and beat to combine. Scrape the sides of the bowl. In a separate bowl, combine the flour, baking powder, baking soda, and salt. Add half of the flour mixture to the butter and stir to almost combine. Add half of the buttermilk and stir to almost combine. Repeat this process once more until all of the flour mixture and milk has been combined. Scrape the sides of the bowl and fold in any unincorporated bits.
  3. Spread the batter out in the greased skillet. Arrange the berries all over the top of the batter, pressing them down gently into the batter. Bake in the preheated oven for about 15 minutes, and then carefully sprinkle the streusel on top of the cake. Bake for an additional 12 minutes or until a toothpick inserted comes out clean. Allow to cool slightly prior to serving. 

Did you make this recipe?

Share a photo and tag us — we can’t wait to see what you’ve made!

No-Bake Lemon Icebox Pie (and a fresh Mother’s Day Gift Guide!)

No-Bake Lemon Icebox Pie and Mother's Day Gift Guide by Wood and Spoon blog. This simple lemon icebox pie is completely no bake and terrific for novice and beginner bakers! Made with fresh lemon juice, cream cheese, and whipped cream, this fresh and summery treat is a yummy way to welcome warmer days ahead. Learn how to make this easy dessert on thewoodandspoon.com

The fabulous (and kind of embarrassing) part of writing a blog is that, in a way, you’re kind of just writing to yourself. Sure, on my most egomaniacal days, I like to imagine that I’m reaching millions of people, each paragraph of every post resonating with readers all across the world, but in all reality, I’m usually just writing to myself and my Mom. (Hi, Mom!) So today, in honor of Mother’s Day and in addition to an absolutely fabulous, insanely easy no-bake lemon icebox pie recipe that will come later, I’m going to interview myself to answer all the questions about motherhood approximately no one everyone is currently asking me.

Q: So tell me about your kids!

I’m a mom to three tiny humans: Aimee (6), George (almost 5), and Charlie (1). Aimee is my bold, type A, creative mini-me. She’s a little bossy but only because her big Mama-bird heart really believes it’s her job to take care of everyone. Aimee makes friends wherever she goes, and her kindness and compassion for the people around her is admirable.

George is the silliest, snuggliest kiddo in the bunch. He loves to be loved and to give out his love to anyone who will receive it. George’s laugh is one of the single-greatest sounds I’ve ever heard in my life, and thankfully, I get to hear it often.

And finally, there’s Charlie. He’s the newest in the bunch, and we’re still getting to know his little personality. So far I’ve seen him to be strong-willed, fearless, and eager to keep up with his older siblings. Also, I know every mother thinks their kid is a smart, but this mother KNOWS her kid is; Charlie has mad street smarts, even as a 1-year-old. Please pray for me.


Q: Wow! It sounds like you have your hands full. How do you juggle motherhood and a work-from-home job?

Let me start by saying that, besides mothers, childcare workers are the most underpaid and overworked people I’ve ever met in my life. My kids all go to school/daycare for at least a few hours each day, and I have those women to thank for my workday freedom (and sanity). While they go to school and drive their teachers insane, I get to plug away at this little site and do all the household stuff that no one cares about.


Q: Lucky you! Sounds like you’ve got it all down to a science!

Wrong. Wrong, wrong, wrong, wrong. Mothering is the one thing that cannot be subjected to scientific law, because children are forever changing, morphing into little Transformer versions of people I’ve never met. For example, last Monday, one of my kids requested blueberries in his lunchbox and then proceeded to eat the entirety of the two pints I had stored in the fridge. Delighted that he was enjoying fruit so much, I brought more berries home only to have him spit at them, puckering his lips and declaring he was allergic to them. Well, I wasn’t having it. I let him sit with those blueberries until he finally came clean with his real reason for avoiding them: he wanted Cheez-It’s in his lunchbox instead. Rule #1 of parenting: WE DO NOT NEGOTIATE WITH TERRORISTS.


Q: Aww, that’s so funny. Kids do the dardest things. Tell me more!

You’re right, it probably would be super funny if that was the only resistance I came up against on a daily basis. But then there’s bath time, temper tantrums, and trying to keep track of all those tiny socks. There’s spilled sippy cups in my car and sticky mouth stains on the shoulders of all my shirts. Also, have you ever tried to put long john pajamas on a baby straight from the bath? Have you ever found your phone in the garbage can or your retainer in the toilet? Have you ever found your kid hiding in the pantry with a Costco-sized bin of gummy bears 5 minutes before bedtime? *Cough* Yeah, me neither.


Q: Wow, that was kind of an intense over-share. Maybe we can get back to the fun parts of motherhood?

Sorry for spoiling your fun, Karen. I was just being honest. But you’re right- there is so much good stuff to gush about when it comes to motherhood. I can’t speak to mothering older kids or adults, but I will say that one of the sweetest parts of mothering younger kids is knowing sure as anything how much they love you. You can see in their eyes and feel it in the way they linger in those morning hugs. As exhausting as the schedules and discipline and wide-open chaos can be from time to time, I know that even when they don’t acknowledge it they are receiving all the little bits of love I throw their way. What a privilege it is to be that person for someone.

One day in particular will stick out in my mind forever- a few years ago, one of my kiddos crawled up in my lap and, after sitting there still for a few minutes, looked up at me and said, “Mama, you make me feel safe.” It wrecked me. Ultimately, that kind of trust is something we all are looking for from the people we love, and I get to offer it three times over. #Blessed.


Q: Such a sweet story! Any last words on mothering?

I dreamed about being a mother my whole life (No, literally though. I think I scared a lot of my high school boyfriends away when I told them I just wanted to be a Mom when I grew up, but I’ll save those relationships for another interview), and I’m happy to report that motherhood is everything I dreamed it would be and more. The longer I mother my own children the more I realize that mothering isn’t reserved for the select few that grow, birth, and raise children under their own roof.

As women, we’re all called to motherhood in our own unique way, and now, I am able to look back and recognize how all sorts of women mothered me throughout my own life: aunts, mothers of friends, sweet women at church, and even grown ladies I rub shoulders in the present time. So many women have poured out encouragement and love and truth into my life, and that kind of selfless, unwarranted love is precisely what mothering looks like. So for all the women out there with kids or without kids: Happy Early Mother’s Day. You have an opportunity to mother beautifully right where you are, and I hope you receive the love and gratitude you deserve for it in the coming week.

The Gift Guide

So today, if you find yourself with a Mama you want to love on this coming Mother’s Day, check out the guide I’ve prepared below! Lots of my favorite things are represented on this list, and I have a hunch you know just the person to buy them for.

No-Bake Lemon Icebox Pie and Mother's Day Gift Guide by Wood and Spoon blog. This simple lemon icebox pie is completely no bake and terrific for novice and beginner bakers! Made with fresh lemon juice, cream cheese, and whipped cream, this fresh and summery treat is a yummy way to welcome warmer days ahead. Learn how to make this easy dessert on thewoodandspoon.com

From top left clockwise:
Winc Wine Subscription
Swim Cover-Up Romper
Zalto Wine Glasses
Lululemon Wunder Under Train Leggings
Woven Slide Sandals
Citrus Press
Monogrammed Beach Tote
OPI Longwear Nail Laquer
Relaxed Denim Shorts
Faux Orchid
One Love Enzyme Cleansing Oil
Letters to My Son (or Daughter!) Book

No-Bake Lemon Icebox Pie and Mother's Day Gift Guide by Wood and Spoon blog. This simple lemon icebox pie is completely no bake and terrific for novice and beginner bakers! Made with fresh lemon juice, cream cheese, and whipped cream, this fresh and summery treat is a yummy way to welcome warmer days ahead. Learn how to make this easy dessert on thewoodandspoon.com

Now onto this no-bake lemon icebox pie.

Why do we need this lemony dessert in our life? Because it’s no-bake. So simple. Quick to make and entirely refreshing. If you’re new to baking or, like me, just need a few things in your back pocket that are insanely delish and easy to make, this no-bake lemon icebox pie is just the thing. With a graham cracker crust and a whipped lemony cream cheese filling, this dessert is the freezer all-star us Moms need.

No-Bake Lemon Icebox Pie and Mother's Day Gift Guide by Wood and Spoon blog. This simple lemon icebox pie is completely no bake and terrific for novice and beginner bakers! Made with fresh lemon juice, cream cheese, and whipped cream, this fresh and summery treat is a yummy way to welcome warmer days ahead. Learn how to make this easy dessert on thewoodandspoon.com

To make this no-bake lemon icebox pie, we start with the salty graham cracker crust. Butter, graham cracker crumbs, brown sugar, and salt come together into a sandy mixture that get pat into the bottom of a springform pan. The filling here is just a few ingredients too: lemon juice, cream cheese, sweetened condensed milk, and loads of whipped cream. You can think of it as a no-churn ice cream in a pie crust (aka HEAVEN!) After a long stint in the freezer, this dessert is ready to go. Make it ahead and serve it slightly thawed from the freezer for a bright, refreshing, and decadent treat. This is the perfect dessert this time of year, but would be great in the warmer months too.

I do hope you enjoy this no-bake lemon icebox pie. If you happen to try it, let me know what you think! Happy Mother’s Day to all the women out there and happy baking, friends!

No-Bake Lemon Icebox Pie and Mother's Day Gift Guide by Wood and Spoon blog. This simple lemon icebox pie is completely no bake and terrific for novice and beginner bakers! Made with fresh lemon juice, cream cheese, and whipped cream, this fresh and summery treat is a yummy way to welcome warmer days ahead. Learn how to make this easy dessert on thewoodandspoon.com

If you like this no-bake lemon icebox pie you should try:

Lemon Lavender Icebox Cake
Strawberry Icebox Pie
Lemon Poppyseed Muffins
Lemon Olive Oil Pie

Print

No-Bake Lemon Icebox Pie (and a fresh Mother’s Day Gift Guide!)

This Lemon Icebox Pie is a no-bake treat that can be made ahead with just a few simple ingredients!

  • Author: Kate Wood
  • Prep Time: 15
  • Total Time: 15
  • Yield: 9 Servings
  • Category: Dessert

Ingredients

For the crust:

  • 16 graham crackers (240 grams) crushed to crumbs
  • ½ cup (113 gm) unsalted butter, melted
  • 6 tablespoons brown sugar, packed
  • 1 teaspoon kosher salt

For the filling:

  • 11/2 cups heavy whipping cream
  • 4 ounces cream cheese at room temperature
  • 1 (14 ounce) can sweetened condensed milk
  • 11/2 tablespoons lemon zest
  • 1/2 cup fresh squeezed lemon juice (from about 3 large lemons)

Topping:

  • ½ cup heavy whipping cream
  • 3 tablespoons sugar

Instructions

To make the crust:

  1. Combine all of the ingredients together in a large bowl until it comes together into a sandy mixture. Pat the crumbs into the bottom and 1” up the sides of a 9” springform pan. Set aside while you assemble your filling. 

To make the pie:

  1. In a large bowl, whip the heavy whipping cream on medium speed using the whisk attachment until stiff peaks form and the mixture becomes fluffy and cloud-like. Set aside.
  2. In a separate bowl, beat the cream cheese until smooth and no lumps remain. Stir in the condensed milk, lemon zest, and lemon juice until smooth. Use a rubber spatula to fold in the whipped cream until fluffy and combined. Spread the mixture into the pan on top of the crust and place in the freezer to firm up, about 2 hours. At that time, make the topping by whipping the cream and sugar on medium speed until it thickens to a cloud-like consistency. Gently spread this on top of the lemon filling and place back in the freezer to freeze until solid, about 6 hours. When ready to consume, run a warm knife along the edges of the pan to release the pie from the sides. Slice and serve cold!

Did you make this recipe?

Share a photo and tag us — we can’t wait to see what you’ve made!

Southern Coconut Cream Pie

Southern Coconut Cream Pie and our Trip to the Exumas. This is a stovetop vanilla custard pie flavored with sweetened coconut flakes and topped with a homemade whipped cream. The butter and shortening flaky pie crust is filled with the coconut milk filling and it makes for a delicious summertime or spring tropical flavored bake ahead pie for dessert. Learn how simple it is to make southern pies on thewoodandspoon.com

If you live in my neck of the woods, it’s the first day back after a much-needed spring break. Although Mondays and I don’t typically get along, I’m feeling refreshed and really happy to settle into a normal pace of life today. This past week, my family and I were hugely fortunate to vacation with our closet friends in The Bahamas, and it. was. phenomenal. It’s been years since I’ve visited the islands, and this was my very first time scoping out any area outside of the hyper-touristy Nasseau. Today, I’m going to share a Southern coconut cream pie as a nod to those island flavors as well as a few pictures from our time spent there. Also, full disclosure: I am not a travel agent. Planning trips outside of metropolitan areas is not my area of expertise, but fortunately, one of my dear friends absolutely rocks at it. So while I can’t take credit for anything that happened on this trip, I feel hugely fortunate to be on the receiving end of her travel savvy (thanks Rayne!). Lucky me.

Southern Coconut Cream Pie and our Trip to the Exumas. This is a stovetop vanilla custard pie flavored with sweetened coconut flakes and topped with a homemade whipped cream. The butter and shortening flaky pie crust is filled with the coconut milk filling and it makes for a delicious summertime or spring tropical flavored bake ahead pie for dessert. Learn how simple it is to make southern pies on thewoodandspoon.com

The Exumas

For those that don’t know, the Exumas are a small chain of cays that make up part of The Bahamas. Envision white sand and turquoise water and stretches of unspoiled beaches. (Sidenote: You may have heard of the Exumas as a film location for the Pirates of the Carribbean movies or the famously catastrophic Fyre Festival.) For this trip, we opted to stay in a more undeveloped section known as Little Exuma in a house called the Exuma Outpost (insert my praise hands here). It was incredible. Our house was situated on a little cove that was mostly ours, and, truly, it’s probably the closet I’ll ever come to staying on a private island.

Southern Coconut Cream Pie and our Trip to the Exumas. This is a stovetop vanilla custard pie flavored with sweetened coconut flakes and topped with a homemade whipped cream. The butter and shortening flaky pie crust is filled with the coconut milk filling and it makes for a delicious summertime or spring tropical flavored bake ahead pie for dessert. Learn how simple it is to make southern pies on thewoodandspoon.com

What We Did

We opted to charter a boat for a couple days of our trip as a means of exploring the Exumas. Snorkeling, swimming with sea turtles and stingrays, and fishing were among the things we enjoyed on our boat days. The Exumas are definitely best seen by water and both of our tour guides were super knowledgable- I’d highly recommend. On the off days, we let the kids swim in the pool and explore the ocean, even taking time to read, sleep in, and play games. For meals, we enjoyed the hole-in-the-wall, open-air restaurants that speckled the island serving fish sandwiches and rum punch. Although Brett and I normally favor a few nice dinners or fancy outings, it was refreshing to be able to head anywhere in our sandals and jean shorts. We did opt for some in-house catering on two evenings, and that was terrific. Who better to give us a taste of local flavors than the locals themselves?!

Southern Coconut Cream Pie and our Trip to the Exumas. This is a stovetop vanilla custard pie flavored with sweetened coconut flakes and topped with a homemade whipped cream. The butter and shortening flaky pie crust is filled with the coconut milk filling and it makes for a delicious summertime or spring tropical flavored bake ahead pie for dessert. Learn how simple it is to make southern pies on thewoodandspoon.com

Where We Stayed

For our family, the trip was a terrific time with friends and a chance to let our two oldest (Charlie stayed home!) get some play time and swim practice before summer arrives. Both kids fell in love with the Bahamas. When we returned home, George said he wished he could be on vacation everyday. Me too, buddy, me too. I would absolutely recommend this kind of a vacation families interested in a no-frills vacation in the prettiest location possible. What the undeveloped terrain of the Exumas lacks in fancy restaurants and touristy attractions, it makes up for in relaxation, beauty, and frozen mojitos (insert more praise hands). Here’s a few more photos!

Southern Coconut Cream Pie and our Trip to the Exumas. This is a stovetop vanilla custard pie flavored with sweetened coconut flakes and topped with a homemade whipped cream. The butter and shortening flaky pie crust is filled with the coconut milk filling and it makes for a delicious summertime or spring tropical flavored bake ahead pie for dessert. Learn how simple it is to make southern pies on thewoodandspoon.com

Southern Coconut Cream Pie.

I am not a crazy coconut person (unless we’re talking Pina coladas, okay?), but I do love a good old-fashioned southern pie. This one fits the bill. Here, my favorite pie crust holds the sweetened stovetop filling made with coconut milk, coconut flakes, and a generous amount of sugar. While the pie isn’t overly coconutty, it is seriously creamy and has a decent amount of texture given the toasted coconut and crisp, buttery shell. I love this Southern coconut cream pie this time of year just before summer berries and stone fruits steal the show. If you’re looking for a last-minute dessert option for your Easter tables, HELLO. It’s here.

Southern Coconut Cream Pie and our Trip to the Exumas. This is a stovetop vanilla custard pie flavored with sweetened coconut flakes and topped with a homemade whipped cream. The butter and shortening flaky pie crust is filled with the coconut milk filling and it makes for a delicious summertime or spring tropical flavored bake ahead pie for dessert. Learn how simple it is to make southern pies on thewoodandspoon.com

To make this Southern coconut cream pie, we start with the pie crust. Flour, butter, and shortening come together in a soft dough that parbakes in a deep dish pie pan. Once cooled, you can start on the filling. Half and half cooks with sugar, coconut milk, and flour until thickened. A single egg plus a few extra yolks comes next, stirring just until it’s bubbling and thickened again. Butter, vanilla, and sweetened coconut flakes fninsh out the filling that is now ready to be poured into the prepared pie crust. There is some wait time involved: cream pies need about 6 hours to set. Once chilled, a little extra whipped cream (ok, a lotta extra) is added, followed by some toasted coconut. Voila! Delicious.

Southern Coconut Cream Pie and our Trip to the Exumas. This is a stovetop vanilla custard pie flavored with sweetened coconut flakes and topped with a homemade whipped cream. The butter and shortening flaky pie crust is filled with the coconut milk filling and it makes for a delicious summertime or spring tropical flavored bake ahead pie for dessert. Learn how simple it is to make southern pies on thewoodandspoon.com

Give this southern coconut cream pie a whirl and let me know what you think! Also, tell me about your own travels! Have you managed to take any small outings this year? Any post-COVID trips on the horizon? I’m ready to get out and about, and this trip was the perfect way to start. Happy Monday, y’all!

If you like this southern coconut cream pie you should try:

Banana Coconut Chocolate Cream Pie
Hazelnut Mocha Cream Pie
Banana Cream Pie Cake
Vegan Coconut Lime Ice Cream Pie
Coconut Cream Pie Puffs
Banana Cream Pie with Oatmeal Cookie Crust

Print

Southern Coconut Cream Pie

This southern coconut cream pie features a flaky homemade crust, a sweetened coconut milk filling, and loads of whipped cream and toasted coconut on top!

  • Author: Kate Wood
  • Prep Time: 45
  • Cook Time: 30
  • Total Time: 360
  • Yield: 9 Servings
  • Category: Dessert

Ingredients

For the crust:

  • 13/4 cups (245 gm) all-purpose flour
  • 2 teaspoons sugar
  • 1/4 teaspoon salt
  • 5 tablespoons chilled solid vegetable shortening, cut into pieces
  • 6 tablespoons chilled unsalted butter, cut into pieces
  • 5 tablespoons (approximately) ice water
  • 1 large egg whisked with 1 teaspoon water

For the filling:

  • 1 cup (200 gm) sugar
  • ½ cup (70 gm) all-purpose flour
  • 3/4 teaspoon salt
  • 1 can (13.5 ounces)  full fat coconut milk, shaken to combine
  • 11/4 cups (360 gm) half and half
  • 1 large egg plus 2 large egg yolks, whisked together in a small bowl
  • 2 tablespoons unsalted butter
  • 11/2 teaspoons vanilla extract
  • 1 cup sweetened flaked coconut

For the topping:

  • 1 cup heavy whipping cream
  • ¼ cup sugar
  • Additional sweetened coconut flakes, if desired

Instructions

To prepare the crust:

  1. Whiz the flour, sugar, and salt in a food processor to combine (Note: you can also do this by hand with a pastry cutter!) Pulse in the shortening and butter, just until evenly dispersed in pea-sized clumps. Begin adding ice water 2 tablespoons at a time until moist clumps begin to form. Remove dough from food processor, form it into a flat round disk, and wrap in plastic wrap. Chill in the fridge for at least an hour prior to use.
  2. When you’re ready to bake the pie, roll the dough out on a well-floured surface into a 1/8-1/4” circle about an inch larger than your pie plate on all sides. Roll the dough loosely back onto the rolling pin and lift it into the pie dish. Gently fit the dough into the pie plate and trim off any excess dough leaving a 1” border around the edge of the dish. Fold the lip of the dough under so that it extends just over the edge of the pie plate and crimp the edges as you prefer. Prick a few holes in the bottom of the dough with a fork and place the whole pan into the freezer to chill briefly, about 20 minutes. In the meantime, preheat the oven to 400 degrees.
  3. When the oven is preheated, remove the pie plate from the freezer and line the insides of it with a piece of parchment paper. Use either pie weights or dry beans/rice to weigh down the dough and bake on the lowest rack in the oven for about 15 minutes. After this initial bake, remove the pie weights, brush the entire crust with a thin layer of egg wash (the egg whisked with water), and bake on the center rack of the oven for an additional 7-10 minutes or until golden brown. Set aside to cool while you prepare your filling.

To prepare the filling:

  1. In a heavy-bottomed pan, whisk together the sugar, flour, and salt. Whisk the coconut milk and half and half together in a small bowl, breaking up any clumps that may have been in the coconut milk with a whisk. Slowly add in the milky mixture, stirring all the while, and set the pan over medium-low heat. Keep stirring regularly until the mixture comes to a bubble. Continue stirring and cooking an additional 1-2 minutes, removing from heat only once the mixture has thickened to a mayonnaise consistency. Carefully scoop up a cup of the hot mixture in a measuring cup of ladle and slowly add it to the eggs, whisking them all the while to ensure they don’t scramble under the heat of the pudding. Once the entire cup has been added, pour the egg mixture back with the remaining pudding in the pan, stir, and place back on low heat. Bring to a bubble again and cook for an additional minute and a half to thicken and then remove from heat. Stir in the vanilla, butter, and coconut and pour the mixture into the prepared pie crust. Place a sheet of plastic wrap directly on top of the filling and refrigerate until cooled and firm.
  2. Once cooled, prepare your topping by beating the whipping cream in a large bowl on medium speed until thickened to soft peaks. Slowly add in the sugar and continue whipping until thickened to a cloud-like consistency. Top the pie with the whipped cream and toast the coconut flakes on the stove until golden. Sprinkle on top and serve immediately!

Did you make this recipe?

Share a photo and tag us — we can’t wait to see what you’ve made!

Ghirardelli Chocolate Espresso Tarts

Chocolate Espresso Tarts by Wood and Spoon blogs. These tarts have a cocoa powder and espresso shortbread crust and a rich and buttery semisweet chocolate ganache filling. To top them, a simple espresso whipped cream is added! These tarts make a great festive individual dessert but each one can easily serve as a dessert for two as well! Learn how to make homemade chocolate tarts on thewoodandspoon.com

We’re coming out of that time of year when people go nuts for all the cozy fall flavors: pumpkin, apple, maple, pecan, and more. Don’t get me wrong- I love a traditional Thanksgiving dessert as much as the average bird, but you know what’s always in season? CHOCOLATE. That single ingredient has gotten me through more breakups, celebrations, hard days, and more, and today, chocolate is the ingredient that will shine in our newest recipe: Ghirardelli Chocolate espresso tarts. Let me tell you all about them.

Chocolate Espresso Tarts by Wood and Spoon blogs. These tarts have a cocoa powder and espresso shortbread crust and a rich and buttery semisweet chocolate ganache filling. To top them, a simple espresso whipped cream is added! These tarts make a great festive individual dessert but each one can easily serve as a dessert for two as well! Learn how to make homemade chocolate tarts on thewoodandspoon.com

These chocolate espresso tarts are not for the faint of heart. These rich treats are for the chocolate lovers who aren’t afraid of a little indulgence and want to celebrate the coming weeks with a dessert special enough for the occasion. Here, a simple press-in cocoa and espresso powder-scented shortbread crust is baked in individual tart forms and filled with a silky semisweet chocolate ganache. Each serving is finished with a dollop of espresso whipped cream which complements each chocolatey bite both with flavor and texture. Here’s how to make them.

Espresso Chocolate Tarts by Wood and Spoon blogs. These tarts have a cocoa powder and espresso shortbread crust and a rich and buttery semisweet chocolate ganache filling. To top them, a simple espresso whipped cream is added! These tarts make a great festive individual dessert but each one can easily serve as a dessert for two as well! Learn how to make homemade chocolate tarts on thewoodandspoon.com

How to Make Them:

First, we start with the crust. Flour, sugar, cocoa powder, and espresso come together with a pool of melted butter. The crumbly aftermath gets pressed into the bottoms of 5 individual fluted tart pans and baked in a preheated oven. In the meantime, we can make the ganache. The Chocolate Chips combine with whipping cream and unsalted butter to make a ganache that sets up as it cools . Finally, we top each with espresso-scented cream and any extra crumbles of the chocolate crust you may have on hand. Voila!

Chocolate Espresso Tarts by Wood and Spoon blogs. These tarts have a cocoa powder and espresso shortbread crust and a rich and buttery semisweet chocolate ganache filling. To top them, a simple espresso whipped cream is added! These tarts make a great festive individual dessert but each one can easily serve as a dessert for two as well! Learn how to make homemade chocolate tarts on thewoodandspoon.com

The holidays may look different this year, but we can make them sweeter with celebratory treats like these. Many thanks to Ghiradelli for sponsoring this #GhirardelliBaking post; check out their site and your local stores for both their bittersweet and semi-sweet baking chip options that make our efforts in the kitchen rewarding and delicious. Happy Baking!

Espresso Chocolate Tarts by Wood and Spoon blogs. These tarts have a cocoa powder and espresso shortbread crust and a rich and buttery semisweet chocolate ganache filling. To top them, a simple espresso whipped cream is added! These tarts make a great festive individual dessert but each one can easily serve as a dessert for two as well! Learn how to make homemade chocolate tarts on thewoodandspoon.com

If you like these Chocolate espresso tarts tarts you should try:

Double Chocolate Ganache Tart
Homemade Chocolate Truffles
Chocolate Caramel Pecan Tarts
Brownie Petit Fours
White Chocolate Ganache Shortbread

Chocolate Espresso Tarts by Wood and Spoon blogs. These tarts have a cocoa powder and espresso shortbread crust and a rich and buttery semisweet chocolate ganache filling. To top them, a simple espresso whipped cream is added! These tarts make a great festive individual dessert but each one can easily serve as a dessert for two as well! Learn how to make homemade chocolate tarts on thewoodandspoon.com
Print

Ghirardelli Chocolate Espresso Tarts

These chocolate espresso tarts have an espresso and cocoa powder shortbread crust and are filled with a buttery semisweet chocolate ganache. Each one is topped with a dollop of espresso whipped cream!

  • Author: Kate Wood
  • Prep Time: 15
  • Cook Time: 10
  • Total Time: 180
  • Yield: 5 Tarts
  • Category: Dessert

Ingredients

For the crust:

  • 1 cup sugar
  • 1/2 cup all-purpose flour
  • ¾ cup Ghirardelli cocoa powder
  • 1 teaspoon espresso powder
  • ¼ teaspoon salt
  • ½ cup (113 gm) unsalted butter, melted

For the filling:

  • 2 cups Ghiradelli Semi-Sweet Chocolate Chips
  • 1 cup heavy whipping cream
  • ¼ cup unsalted butter
  • Pinch of salt

For the espresso whipped cream:

  • 1 cup heavy whipping cream
  • 2 teaspoons espresso powder
  • 1/4 cup powdered sugar

Instructions

To prepare the crust:

  1. Preheat the oven to 350 degrees.
  2. In a medium-sized mixing bowl, whisk together the sugar, flour, cocoa powder, espresso powder, and salt to combine. Add the melted butter and stir with a spatula to just barely combine into large moist clumps. Pat the mixture between 5- 4” fluted tart pans with removable bottoms. Gently press up the sides first and then pat the remaining crust into the bottom. Bake in the preheated oven for 10 or until the crust is set. Set aside to cool while you prepare the filling and whipped cream. 

To prepare the filling:

  1. Place the chocolate chips in a large heat-safe bowl. Gently heat the cream in the microwave or over a stovetop until barely bubbling. Pour over the chocolate chips and cover the bowl with a piece of plastic wrap. Allow to sit for 5 minutes and then use a whisk to stir to combine. Add the butter and salt and stir or beat to combine. Divide the mixture between the prepared tart pans and allow to set up at room temperature. When ready to serve, spoon on dollops of espresso whipped cream and enjoy! 
  2. To prepare the whipped cream: Dissolve he espresso powder in the whipping cream in a large bowl. Whip at medium speed until soft peaks form. Add the powdered sugar and continue whipping until fluffy to your liking.

Did you make this recipe?

Share a photo and tag us — we can’t wait to see what you’ve made!

Sweet Potato Pie Tart with Candied Pecans and Marshmallow Whipped Cream

Sweet Potato Pie Tart with Candied Pecans and Marshmallow Whipped Cream by Wood and Spoon blog. A simple pumpkin pie-esque tart made with sugared nuts, a nuts and graham cracker crust, and a fluffy sweetened whipped cream topping! This is a terrific southern holiday favorite dessert to make during thanksgiving and Christmas winter months and is a beautiful take on the classic treat. Learn how to make them on thewoodandspoon.com

When I moved to the Deep South, I learned that things are done a little differently here than they are up North. Instead of oats and cream of wheat, Southerners rely on breakfast staples like corn grits. At meals where a Northerner might make stuffing, Southerners make cornbread dressing loaded with butter and mild herbs. The tea here is always sweetened, we have our own names for different varieties of peas and beans, and the Thanksgiving staple of pumpkin pie is quite often replaced with the Southern cult favorite: sweet potato pie. Today, we’re doing the Southern thing by making a yummy (and pretty!) sweet potato pie tart with candied pecans, a graham cracker crust, and marshmallow whipped cream. Trust me- you’re going to love it!

Sweet Potato Pie Tart with Candied Pecans and Marshmallow Whipped Cream by Wood and Spoon blog. A simple pumpkin pie-esque tart made with sugared nuts, a nuts and graham cracker crust, and a fluffy sweetened whipped cream topping! This is a terrific southern holiday favorite dessert to make during thanksgiving and Christmas winter months and is a beautiful take on the classic treat. Learn how to make them on thewoodandspoon.com

Sweet Potato Pie vs. Pumpkin Pie

So how does a sweet potato pie differ from a pumpkin pie? Turns out, not too much. Although the flavor is strikingly similar, I find it’s the texture that ends up being slightly different. When coming up with this sweet potato pie tart, my goal was simple: capture the yummy, spiced flavors of classic sweet potato pie with some of the refined appearances of a fancier tart. I think I’ve done just that. Here, a simple and buttery press-in graham cracker and pecan crust is filled with a smooth, cinnamon-spiced sweet potato filling, and topping with candied pecans and marshmallow whipped cream. It’s as cute as it is delish!

Sweet Potato Pie Tart with Candied Pecans and Marshmallow Whipped Cream by Wood and Spoon blog. A simple pumpkin pie-esque tart made with sugared nuts, a nuts and graham cracker crust, and a fluffy sweetened whipped cream topping! This is a terrific southern holiday favorite dessert to make during thanksgiving and Christmas winter months and is a beautiful take on the classic treat. Learn how to make them on thewoodandspoon.com

I’m sharing today’s recipes with my good friends at Kerrygold. Kerrygold has long been my go-to for butter needs, and this sweet potato pie tart is no exception. Here, their yummy butter holds together the crumb crust and lends flavor to the candied nuts. This year, they’re partnering with bakers to highlight local ingredients and flavors that pair nicely with their butter. Be sure to check out their site for more favorite holiday recipes! Even though the holidays look different each year, food remains one of those things that brings us together, even from miles away. I love that we can honor the people we love by the food we create in our kitchens. Don’t you?

Sweet Potato Pie Tart with Candied Pecans and Marshmallow Whipped Cream by Wood and Spoon blog. A simple pumpkin pie-esque tart made with sugared nuts, a nuts and graham cracker crust, and a fluffy sweetened whipped cream topping! This is a terrific southern holiday favorite dessert to make during thanksgiving and Christmas winter months and is a beautiful take on the classic treat. Learn how to make them on thewoodandspoon.com

Happy holidays to you all and thank you to Kerrygold for sponsoring this post! I hope you all will check out their site for more recipes and give this sweet potato pie tart a try! Happy Baking!

If you like this sweet potato pie tart you should try:

Sweet Potato Meringue Pie
Black Bottom Pumpkin Pie
Sweet Potato Cinnamon Rolls
Pumpkin Pancakes
Sweet Potato Buns

Print

Sweet Potato Pie Tart with Candied Pecans and Marshmallow Whipped Cream

This sweet potato pie tart features a butter graham and pecan crust, a candied pecan topping, and marshmallow fluff whipped cream!

  • Author: Kate
  • Prep Time: 30
  • Cook Time: 30
  • Total Time: 120
  • Yield: 9 Servings
  • Category: Dessert

Ingredients

For the crust:

  • 1 cup graham cracker crumbs
  • ¾ cup finely chopped pecans
  • ¼ cup sugar
  • ½ teaspoon salt
  • ½ cup Kerrygold Unsalted Butter, melted

For the filling:

  • 1 cup sweet potato puree (made from about 1 large sweet potato, see notes)
  • 1 cup evaporated milk
  • 3 large eggs
  • ½ cup brown sugar
  • ½ cup sugar
  • 11/2 teaspoons vanilla extract
  • 2 tablespoons all-purpose flour
  • ½ teaspoon salt
  • 11/2 teaspoons cinnamon
  • ¾ teaspoon ginger
  • ¼ teaspoon nutmeg
  • 1/8 teaspoon cloves

For the candied pecans:

  • 21/2 tablespoons sugar
  • 1/8 teaspoon salt
  • 1/2 teaspoon cinnamon 
  • 1 tablespoon Kerrygold Unsalted Butter, melted
  • 1 teaspoon vanilla extract
  • 2 cups shelled pecan halves

For the marshmallow whipped cream:

  • 1 cup heavy whipping cream
  • 5 ounces (about 1 cup) marshmallow fluff

Instructions

To prepare the pie:

  1. Preheat the oven to 350 degrees. Prepare your crust: combine the graham cracker crumbs, pecans, sugar, and salt in a large bowl. Add the butter and stir to combine. Press the wet crumbs into the bottom and sides of a 9” tart pan with a removable bottom. I like to press a small amount of crumbs up the length of the sides first and then press the remaining into the bottom. Bake in the preheated oven for 8-10 minutes or until the edges are turning gold and the bottom is set. 
  2. Prepare your filling: In a large bowl, whisk together the sweet potato puree and evaporated milk. Add the egg and sugar, stirring just until combined. Add the remaining ingredients and stir to combine. Pour the filling into the prepared crust and bake at 350 degrees for about 35-40 minutes or until the center of the pie is set and no longer really jiggly. Allow to cool to room temperature.

To prepare the pecans:

  1. Preheat the oven to 325 degrees Farenheit. Line a large rimmed baking sheet with foil and lightly grease with cooking spray. Set aside.
  2. In a small bowl, combine the sugar, salt, and cinnamon. In a separate bowl, stir together the butter and vanilla and then toss in the pecans. Add the sugar mixture and toss to evenly coat the nuts. Spread the nuts out on the baking pan and bake for about 20 minutes, stirring every 10 minutes. Once dry and aromatic, remove from the oven and allow to cool completely. Store in an airtight container until ready to serve. 

To prepare the whipped cream:

  1. In a large bowl or stand mixer fitted with the whisk attachment, whip the cream on medium speed until thickened and medium peaks form. Add the marshmallow fluff and continue whipping until thickened to a cloud-like consistency. Dollop on top of the pie and decorate with pecans as desired.

Notes

  • To make sweet potato puree, peel and dice one large sweet potato and boil in a medium-sized pot of water until the potatoes are tender to the fork, about 10-15 min depending on the size of your potato pieces. Puree in a blender or food processor with 2-3 tablespoons of water, or more as needed to get a thick but smooth puree. Allow to cool prior to using in pie mixture. 

Did you make this recipe?

Share a photo and tag us — we can’t wait to see what you’ve made!

Maple Cream Tart

Maple Cream Tart by Wood and Spoon. This is a simple cream tart made with a biscoff cookie and pecan crust, a maple cream pie filling, and a homemade maple caramel. This sweet and salty holiday dessert can be made ahead and feeds a crowd. Learn how to make this beautiful fall dessert on thewoodandspoon.com

What. A. Week.

If the radio silence around here and social media has given any wonder as to whether or not this website even exists anymore, let me just reassure you: we’re still alive. Last week, Hurricane Zeta passed through our town and absolutely wreaked havoc. We remained safe in our storm shelter and our house was relatively unaffected, but the landscape of our sweet city went through the ringer. At the present moment, 6 days later, we are still without power, and nearly every street is littered with down power lines, fallen trees, and various limbs and brush that have been gathered by home and business owners alike. As someone who lived in central Florida for 10+ years, I can say that the damage we’re experiencing is some of the worst I’ve seen, and man, I’m just grateful we’re all okay.

Maple Cream Tart by Wood and Spoon. This is a simple cream tart made with a biscoff cookie and pecan crust, a maple cream pie filling, and a homemade maple caramel. This sweet and salty holiday dessert can be made ahead and feeds a crowd. Learn how to make this beautiful fall dessert on thewoodandspoon.com

I’m eager for us to catch up on all that we’ve missed (hello, election!) and the events of the past couple of weeks (birthdays! holidays! big life stuff!), but for now, I want to share this maple cream tart with you. With a spiced pecan and cookie crust and a seriously rich and cream filling, this is a decadent autumn treat that would make a great addition to your upcoming holiday tables. Let me tell you how to make it!

Maple Cream Tart by Wood and Spoon. This is a simple cream tart made with a biscoff cookie and pecan crust, a maple cream pie filling, and a homemade maple caramel. This sweet and salty holiday dessert can be made ahead and feeds a crowd. Learn how to make this beautiful fall dessert on thewoodandspoon.com

Making the Tart

First we’ll start with the crust. Biscoff cookies are ground to a crumb and tossed with some pecans, butter, and brown sugar. YUM. After a quick bake in the oven, the cream filling is made on a stovetop using maple syrup, eggs, and milk. Spread the filling in the prepared shell and allow it to cool completely or overnight in the fridge.

Maple Cream Tart by Wood and Spoon. This is a simple cream tart made with a biscoff cookie and pecan crust, a maple cream pie filling, and a homemade maple caramel. This sweet and salty holiday dessert can be made ahead and feeds a crowd. Learn how to make this beautiful fall dessert on thewoodandspoon.com

Garnishing this maple cream tart is a cinch. I love to up the ante with a little homemade maple caramel. Here, all the texture and decadence of caramel combines with the nuanced flavor of maple syrup. It makes a seriously rich topping for this otherwise humble tart. I love to added chopped salted pecans for a little texture too, but you can go with whatever suits your taste!

Maple Cream Tart by Wood and Spoon. This is a simple cream tart made with a biscoff cookie and pecan crust, a maple cream pie filling, and a homemade maple caramel. This sweet and salty holiday dessert can be made ahead and feeds a crowd. Learn how to make this beautiful fall dessert on thewoodandspoon.com

Hugs to y’all. I hope you’re doing well and settling into the weirdness that is November 2020. I’ll see you next week with another fall recipe!

If you like this maple cream tart you should try:


Pumpkin Pecan Tart with Maple Whipped Cream
Maple Oatmeal Biscuits
Salted Maple Pie
Maple Bacon Scones

Print

Maple Cream Tart

This maple cream tart features a biscoff pecan crust, a maple cream filling, and a quick and easy stovetop maple caramel.

  • Author: Kate Wood
  • Prep Time: 25
  • Cook Time: 30
  • Total Time: 120
  • Yield: 9 Servings
  • Category: Dessert

Ingredients

For the crust:

  • 24 Biscoff cookies (186 gm), crushed to crumbs
  • 1 cup finely chopped pecans (90 gm)
  • 6 tablespoons unsalted butter, melted
  • ¼ teaspoon salt

For the filling:

  • 3 tablespoons cornstarch
  • ¼ teaspoon kosher salt
  • 1 cup milk
  • ¾ cup maple syrup
  • 2 large egg yolks
  • 1 cup heavy whipping cream
  • 2 tablespoons sugar

For the maple caramel:

  • 1 cup maple syrup (not imitation)
  • 2 tablespoons unsalted butter
  • ¼ cup heavy whipping cream
  • ¼ teaspoon salt

Instructions

To prepare the crust:

  1. Preheat the oven to 350 degrees. Combine the cookie crumbs, pecans, and melted butter. Stir to combine and press into the sides and bottom of a 9” tart part with a removable bottom. Bake in the preheated oven for about 9 minutes or until set. Allow to cool while you prepare your filling.

To prepare the filling:

  1. In a medium saucepan, whisk together the cornstarch and salt. Add the milk, maple syrup, and egg yolks and stir to combine. Turn the heat to medium heat and bring to a bubble, stirring all along. Once thickened to a pudding consistency, remove from heat and place in a heat-safe bowl. Place a sheet of plastic wrap directly on top to prevent a skin from forming and place in the fridge to cool completely. 
  2. Once cooled at least to room temperature, whip the cream and sugar together until stiff peaks form. Stir the maple pudding; if you notice any clumps, you can push the pudding through a sieve to remove any clumps. Fold the whipped cream and maple pudding together until combined and spread into the prepared pie crust. Garnish with additional cookie crumbs or pecans. Allow to set up in the fridge while you prepare the caramel.

To prepare the caramel:

  1. Bring the maple syrup to a boil in a medium saucepan and continue cooking without stirring until a candy thermometer reaching 230 degrees Fahrenheit (soft ball stage). Remove the pan from heat and carefully stir in the butter, cream and salt. Place in a heat-safe jar or container to cool slightly before serving with slices of the pie. 

Did you make this recipe?

Share a photo and tag us — we can’t wait to see what you’ve made!

Chocolate Pudding Pie

Chocolate Pudding Pie by Wood and Spoon blog. This is an old fashioned Southern chocolate cream pie with a flaky butter and shortening homemade pie crust and an egg custard filling made with cocoa powder! This is a stovetop pie that is a simple treat for a crowd all year round. Chocolate lovers will enjoy this rich dessert on thewoodandspoon.com

It’s been a while since we made fun of my husband. He’s an easy target, not because he’s an unfortunate human but because he’s such a good sport, and I have a particularly terrific time poking fun at his eating habits. If you’ve been around this block a time or two, you know he loves pudding (or, “puddin,” as he would say) but really prefers the store-bought variety. I’m talking Snack Packs. Pudding Packs. The ones that clearly have no real ingredients because they don’t even require refrigeration. He’s easy to please yet impossible to impress, but this chocolate pudding pie is one of the first wins I’ve recorded in a while. He loves it, and I can’t wait to tell you all about it!

Chocolate Pudding Pie by Wood and Spoon blog. This is an old fashioned Southern chocolate cream pie with a flaky butter and shortening homemade pie crust and an egg custard filling made with cocoa powder! This is a stovetop pie that is a simple treat for a crowd all year round. Chocolate lovers will enjoy this rich dessert on thewoodandspoon.com

Old fashioned cream pies are terrific because they generally require no baking and come together easily on the stove. This chocolate pudding pie is no exception to that rule, and, save for the baking of the pie crust, requires no oven time at all! The chocolate flavor is defined but not overly rich thanks to the mild contribution of cocoa powder here. In addition, no chopped chocolate is needed for this treat which means you get to spend less time at the cutting board and more time eating dessert. WIN.

Chocolate Pudding Pie by Wood and Spoon blog. This is an old fashioned Southern chocolate cream pie with a flaky butter and shortening homemade pie crust and an egg custard filling made with cocoa powder! This is a stovetop pie that is a simple treat for a crowd all year round. Chocolate lovers will enjoy this rich dessert on thewoodandspoon.com

To make this pie, we start with the crust. Now, you could use a store-bought or frozen variety, but I would really like for you to try my favorite homemade crust. You can find the recipe down below or read all about it here. Form the dough in whatever standard pie dish you own and then bake until it is golden. Don’t scrimp here- we want a crust that is flaky through and through!

Chocolate Pudding Pie by Wood and Spoon blog. This is an old fashioned Southern chocolate cream pie with a flaky butter and shortening homemade pie crust and an egg custard filling made with cocoa powder! This is a stovetop pie that is a simple treat for a crowd all year round. Chocolate lovers will enjoy this rich dessert on thewoodandspoon.com

Next, to prepare the filling, we starting by combining milk, sugar, flour, and cocoa powder on the stovetop. I like to add the milk really slowly to ensure all of the clumps of cocoa powder dissolve completely. After all, no one wants a clumpy pie! Heat and cook until it thickens slightly and they gradually stir some of that milk mixture into the beaten eggs. Keep whisking all throughout this phase to avoid stirring scrambled eggs into your pie. Re-heat the filling again, bringing it to a thick bubble, and then finish the mixture off with a little vanilla and butter. That’s it! So simple!

Chocolate Pudding Pie by Wood and Spoon blog. This is an old fashioned Southern chocolate cream pie with a flaky butter and shortening homemade pie crust and an egg custard filling made with cocoa powder! This is a stovetop pie that is a simple treat for a crowd all year round. Chocolate lovers will enjoy this rich dessert on thewoodandspoon.com

This chocolate pudding pie is the perfect dessert to transition us from summer into fall. Give it a try in the coming weeks and let me know what you think! Oh, and be sure to try out some of my hubby’s other faves below! Happy Monday and Happy Baking!

Chocolate Pudding Pie by Wood and Spoon blog. This is an old fashioned Southern chocolate cream pie with a flaky butter and shortening homemade pie crust and an egg custard filling made with cocoa powder! This is a stovetop pie that is a simple treat for a crowd all year round. Chocolate lovers will enjoy this rich dessert on thewoodandspoon.com

If you like this chocolate pudding pie you should try:

Banana Coconut Chocolate Cream Pie
Hazelnut Mocha Cream Pie
Banoffee Pie
Chocolate Chess Pie
Chocolate Budino

Print

Chocolate Pudding Pie

This old fashioned chocolate pudding pie is a custard pie made on the stovetop with rich chocolate flavor throughout!

  • Author: Kate
  • Prep Time: 20
  • Cook Time: 35
  • Total Time: 240
  • Yield: 9
  • Category: Dessert

Ingredients

For the crust:

  • 13/4 cups all-purpose flour
  • 2 teaspoons sugar
  • 1/4 teaspoon salt
  • 5 tablespons chilled solid vegetable shortening, cut into pieces
  • 6 tablespoons chilled unsalted butter, cut into pieces
  • 5 tablespoons (approximately) ice water
  • 1 large egg whisked with 1 teaspoon water

For the pie:

  • 1cup sugar
  • 1/2 cup unsweetened cocoa powder
  • 6 tablespoons all-purpose flour
  • 3/4 teaspoon salt
  • 3 cups milk
  • 1 large egg plus 1 yolk, whisked together in a bowl
  • 2 tablespoons unsalted butter
  • 2 teaspoons vanilla extract

For the topping:

  • 1 cup heavy whipping cream
  • 3 tablespoons sugar

Instructions

To prepare the crust:

  1. Whiz the flour, sugar, and salt in a food processor to combine (Note: you can also do this by hand with a pastry cutter!) Pulse in the shortening and butter, just until evenly dispersed in pea-sized clumps. Begin adding ice water 2 tablespoons at a time until moist clumps begin to form. Remove dough from food processor, form it into a flat round disk, and wrap in plastic wrap. Chill in the fridge for at least an hour prior to use.
  2. When you’re ready to bake the pie, roll the dough out on a well-floured surface into a 1/8-1/4” circle about an inch larger than your pie plate on all sides. Roll the dough loosely back onto the rolling pin and lift it into the pie dish. Gently fit the dough into the pie plate and trim off any excess dough leaving a 1” border around the edge of the dish. Fold the lip of the dough under so that it extends just over the edge of the pie plate and crimp the edges as you prefer. Prick a few holes in the bottom of the dough with a fork and place the whole pan into the freezer to chill briefly, about 15 minutes. In the meantime, preheat the oven to 350 degrees.
  3. When the oven is preheated, remove the pie plate from the freezer and line the insides of it with a piece of parchment paper. Use either pie weights or dry beans/rice to weigh down the dough and bake for about 20 minutes. After this initial bake, remove the pie weights, brush the entire crust with a thin layer of egg wash (the egg whisked with water), and bake for an additional 5-10 minutes or until golden brown. Set aside to cool while you prepare your filling.

To prepare the filling:

  1. In a heavy-bottomed pan, whisk together the sugar, cocoa powder, flour, and salt. Slowly add in the milk, stirring all the while, and set the pan over medium-low heat. Keep stirring regularly until the mixture comes to a bubble. Continue stirring and cooking an additional 1-2 minutes, removing from heat only once the mixture has thickened to a mayonnaise consistency. Carefully scoop up a cup of the hot mixture in a measuring cup of ladle and slowly add it to the eggs, whisking them all the while to ensure they don’t scramble under the heat of the pudding. Once the entire cup has been added, pour the egg mixture back with the remaining pudding in the pan, stir, and place back on low heat. Bring to a bubble again and cook for an additional minute and a half to thicken and then remove from heat. Stir in the vanilla and butter and pour the mixture into the prepared pie crust. If you find the pudding has clumps, you can use a fine-mesh strainer to strain out any while you pour it into the crust. Place a sheet of plastic wrap directly on top of the filling and refrigerate until cooled and firm.
  2. Once cooled, prepare your topping by beating the whipping cream in a large bowl on medium speed until thickened to soft peaks. Slowly add in the sugar and continue whipping until thickened to a cloud-like consistency. Serve immediately!

Did you make this recipe?

Share a photo and tag us — we can’t wait to see what you’ve made!

Tomato Pie

Tomato Pie by Wood and Spoon. This is a simple summer pie of fresh farm tomatoes, cheddar cheese, Italian herbs, and a buttery flaky crust! Learn how simple it is to make this savory pie that makes for a terrific lunch or dinner option! Serve this pie for summer gatherings! Learn more on thewoodandspoon.com

I recently offered my grandfather a slice of tomato pie, and he said, “HUH? Tomatoes in a pie?” Turns out, tomato pie is a super Southern thing, and if you were previously unaware, now’s the perfect time to learn all about it. Today’s post is a quick one with a few summer favorites to share with you today, and then we will get to this yummy savory pie!

Tomato Pie by Wood and Spoon. This is a simple summer pie of fresh farm tomatoes, cheddar cheese, Italian herbs, and a buttery flaky crust! Learn how simple it is to make this savory pie that makes for a terrific lunch or dinner option! Serve this pie for summer gatherings! Learn more on thewoodandspoon.com

A New Activity to Consider:

I’m thinking of composting. Do you guys do this already? Now seems like the perfect time to get started, and while researching, I loved this article from GOOP! Send your favorite resources my way if you’re already doing this at home, and check out the article here!

Recipes I’m Dying to Make:

I love a classic PB&J, and this salted PB&J Ice Cream Pie from Bon Appetit looks incredible. A Ritz Cracker crust? Yes, please. I’m also intrigued by this list from FOOD 52 of 11 easy recipes for new home bakers! Tell me all about what you guys are baking at home!

Products I’m Loving:

I love everything from Supergoop, but this sunless tanner with SPF is perfect for these summer days. I usually apply a coat before I head outside and wind up with a nice little glow even after just a few minutes in the sun! I’m also loving my new Chacos. Since I barely get dressed to go anywhere at this point, I basically live in my new sandals, but I’m also super intrigued by their new customizable slides! Check them out here!

Tomato Pie by Wood and Spoon. This is a simple summer pie of fresh farm tomatoes, cheddar cheese, Italian herbs, and a buttery flaky crust! Learn how simple it is to make this savory pie that makes for a terrific lunch or dinner option! Serve this pie for summer gatherings! Learn more on thewoodandspoon.com


Tomato Pie by Wood and Spoon. This is a simple summer pie of fresh farm tomatoes, cheddar cheese, Italian herbs, and a buttery flaky crust! Learn how simple it is to make this savory pie that makes for a terrific lunch or dinner option! Serve this pie for summer gatherings! Learn more on thewoodandspoon.com

Tomato Pie

Here’s what you need to know about tomato pie: It’s cheesy. It’s savory. It’s filling yet refreshing, herbaceous yet creamy, and the whole thing is packed into a delightful buttery crust. I love to serve tomato pie as a lunch or supper option- anywhere you might ordinarily offer a savory tart or quiche. I opted to use a blend of mozzarella (for meltability) and cheddar cheese (for flavor), but a small addition of feta, parmesan, or even asiago would be yummy here too! If you need a shortcut, you can consider doing a refrigerated or frozen store-bought pie crust, but I really love my basic pie dough too much to encourage that. You decide! Give this summer tomato pie a try and let me know what you think! I’ll have another simple recipe for you in less than a week, so stay tuned! Happy Monday, y’all!

Tomato Pie by Wood and Spoon. This is a simple summer pie of fresh farm tomatoes, cheddar cheese, Italian herbs, and a buttery flaky crust! Learn how simple it is to make this savory pie that makes for a terrific lunch or dinner option! Serve this pie for summer gatherings! Learn more on thewoodandspoon.com

Tomato Pie by Wood and Spoon. This is a simple summer pie of fresh farm tomatoes, cheddar cheese, Italian herbs, and a buttery flaky crust! Learn how simple it is to make this savory pie that makes for a terrific lunch or dinner option! Serve this pie for summer gatherings! Learn more on thewoodandspoon.com

If you like this tomato pie you should try:

Tomato Galette
Sausage Kale Pinwheels
Tomato Olive Rolls
Roasted Summer Vegetable Quiche

Print

Tomato Pie

This tomato pie is a butter crust filled with farm-fresh tomatoes, a creamy cheese topping, and loads of flavor!

  • Author: Kate Wood
  • Prep Time: 30
  • Cook Time: 60
  • Total Time: 120
  • Yield: 9 Servings
  • Category: Main

Ingredients

For the crust:

  • 13/4 cups all-purpose flour
  • 2 teaspoons sugar
  • 1/4 teaspoon salt
  • 5 tablespons chilled solid vegetable shortening, cut into pieces
  • 6 tablespoons chilled unsalted butter, cut into pieces
  • 5 tablespoons (approximately) ice water
  • 1 large egg whisked with 1 teaspoon water

For the filling:

  • 3 medium tomatoes, sliced 1/8-1/4” thick
  • Salt and pepper
  • 1 cup shredded cheddar cheese
  • ½ cup shredded mozzarella cheese
  • ½ cup sour cream
  • ¼ cup mayonnaise
  • 2 dashes hot sauce
  • 1/3 cup chopped onion
  • 1 teaspoon olive oil
  • 1 tablespoon Italian seasoning

Instructions

To prepare the crust:

  1. Whiz the flour, sugar, and salt in a food processor to combine (Note: you can also do this by hand with a pastry cutter!) Pulse in the shortening and butter, just until evenly dispersed in pea-sized clumps. Begin adding ice water 2 tablespoons at a time until moist clumps begin to form. Remove dough from food processor, form it into a flat round disk, and wrap in plastic wrap. Chill in the fridge for at least an hour prior to use.
  2. When you’re ready to bake the pie, roll the dough out on a well-floured surface into a 1/8-1/4” circle about an inch larger than your pie plate on all sides. Roll the dough loosely back onto the rolling pin and lift it into the pie dish. Gently fit the dough into the pie plate and trim off any excess dough leaving a 1” border around the edge of the dish. Fold the lip of the dough under so that it extends just over the edge of the pie plate and crimp the edges as you prefer. Prick a few holes in the bottom of the dough with a fork and place the whole pan into the freezer to chill briefly, about 15 minutes, or longer if your dough has gotten soft. In the meantime, preheat the oven to 350 degrees.
  3. When the oven is preheated, remove the pie plate from the freezer and line the insides of it with a piece of parchment paper. Use either pie weights or dry beans/rice to weigh down the dough and bake for about 15 minutes. After this initial bake, remove the pie weights, brush the entire crust with a thin layer of egg wash (the egg whisked with water), and bake for an additional 5 minutes or until set. In the meantime, prepare your filling.

    To prepare the filling:

  4. First, prepare the tomatoes. To remove excess liquid, sprinkle the sliced tomatoes with 1-1/2 teaspoons salt and layer them in a colander with sheets of paper towel. You can gently press down on the towels every so often to squeeze out excess juices. Do this for about 10 minutes.
  5. In a separate bowl, combine the cheese, sour cream, mayonnaise, and hot sauce. Stir and set aside.
  6. Once your pie crust is par-baked, sprinkle the onions on the bottom of the crust, and drizzle with olive oil. Sprinkle on a bit of salt and pepper. Begin to add the drained tomatoes in layers covering the bottom of the crust, sprinkling in salt, pepper, and the Italian seasoning as you go. I used about 1 teaspoon of salt and ½ teaspoon pepper total. Your tomatoes should fill up to about 1” below the lip of the pie crust. Spread the cheese mixture on top and place in the preheated oven to continue baking until the crust is golden and the insides are bubbling throughout about 30 minutes. Remove the pan and allow it to cool completely prior to cutting and serving warmed.

Did you make this recipe?

Share a photo and tag us — we can’t wait to see what you’ve made!