
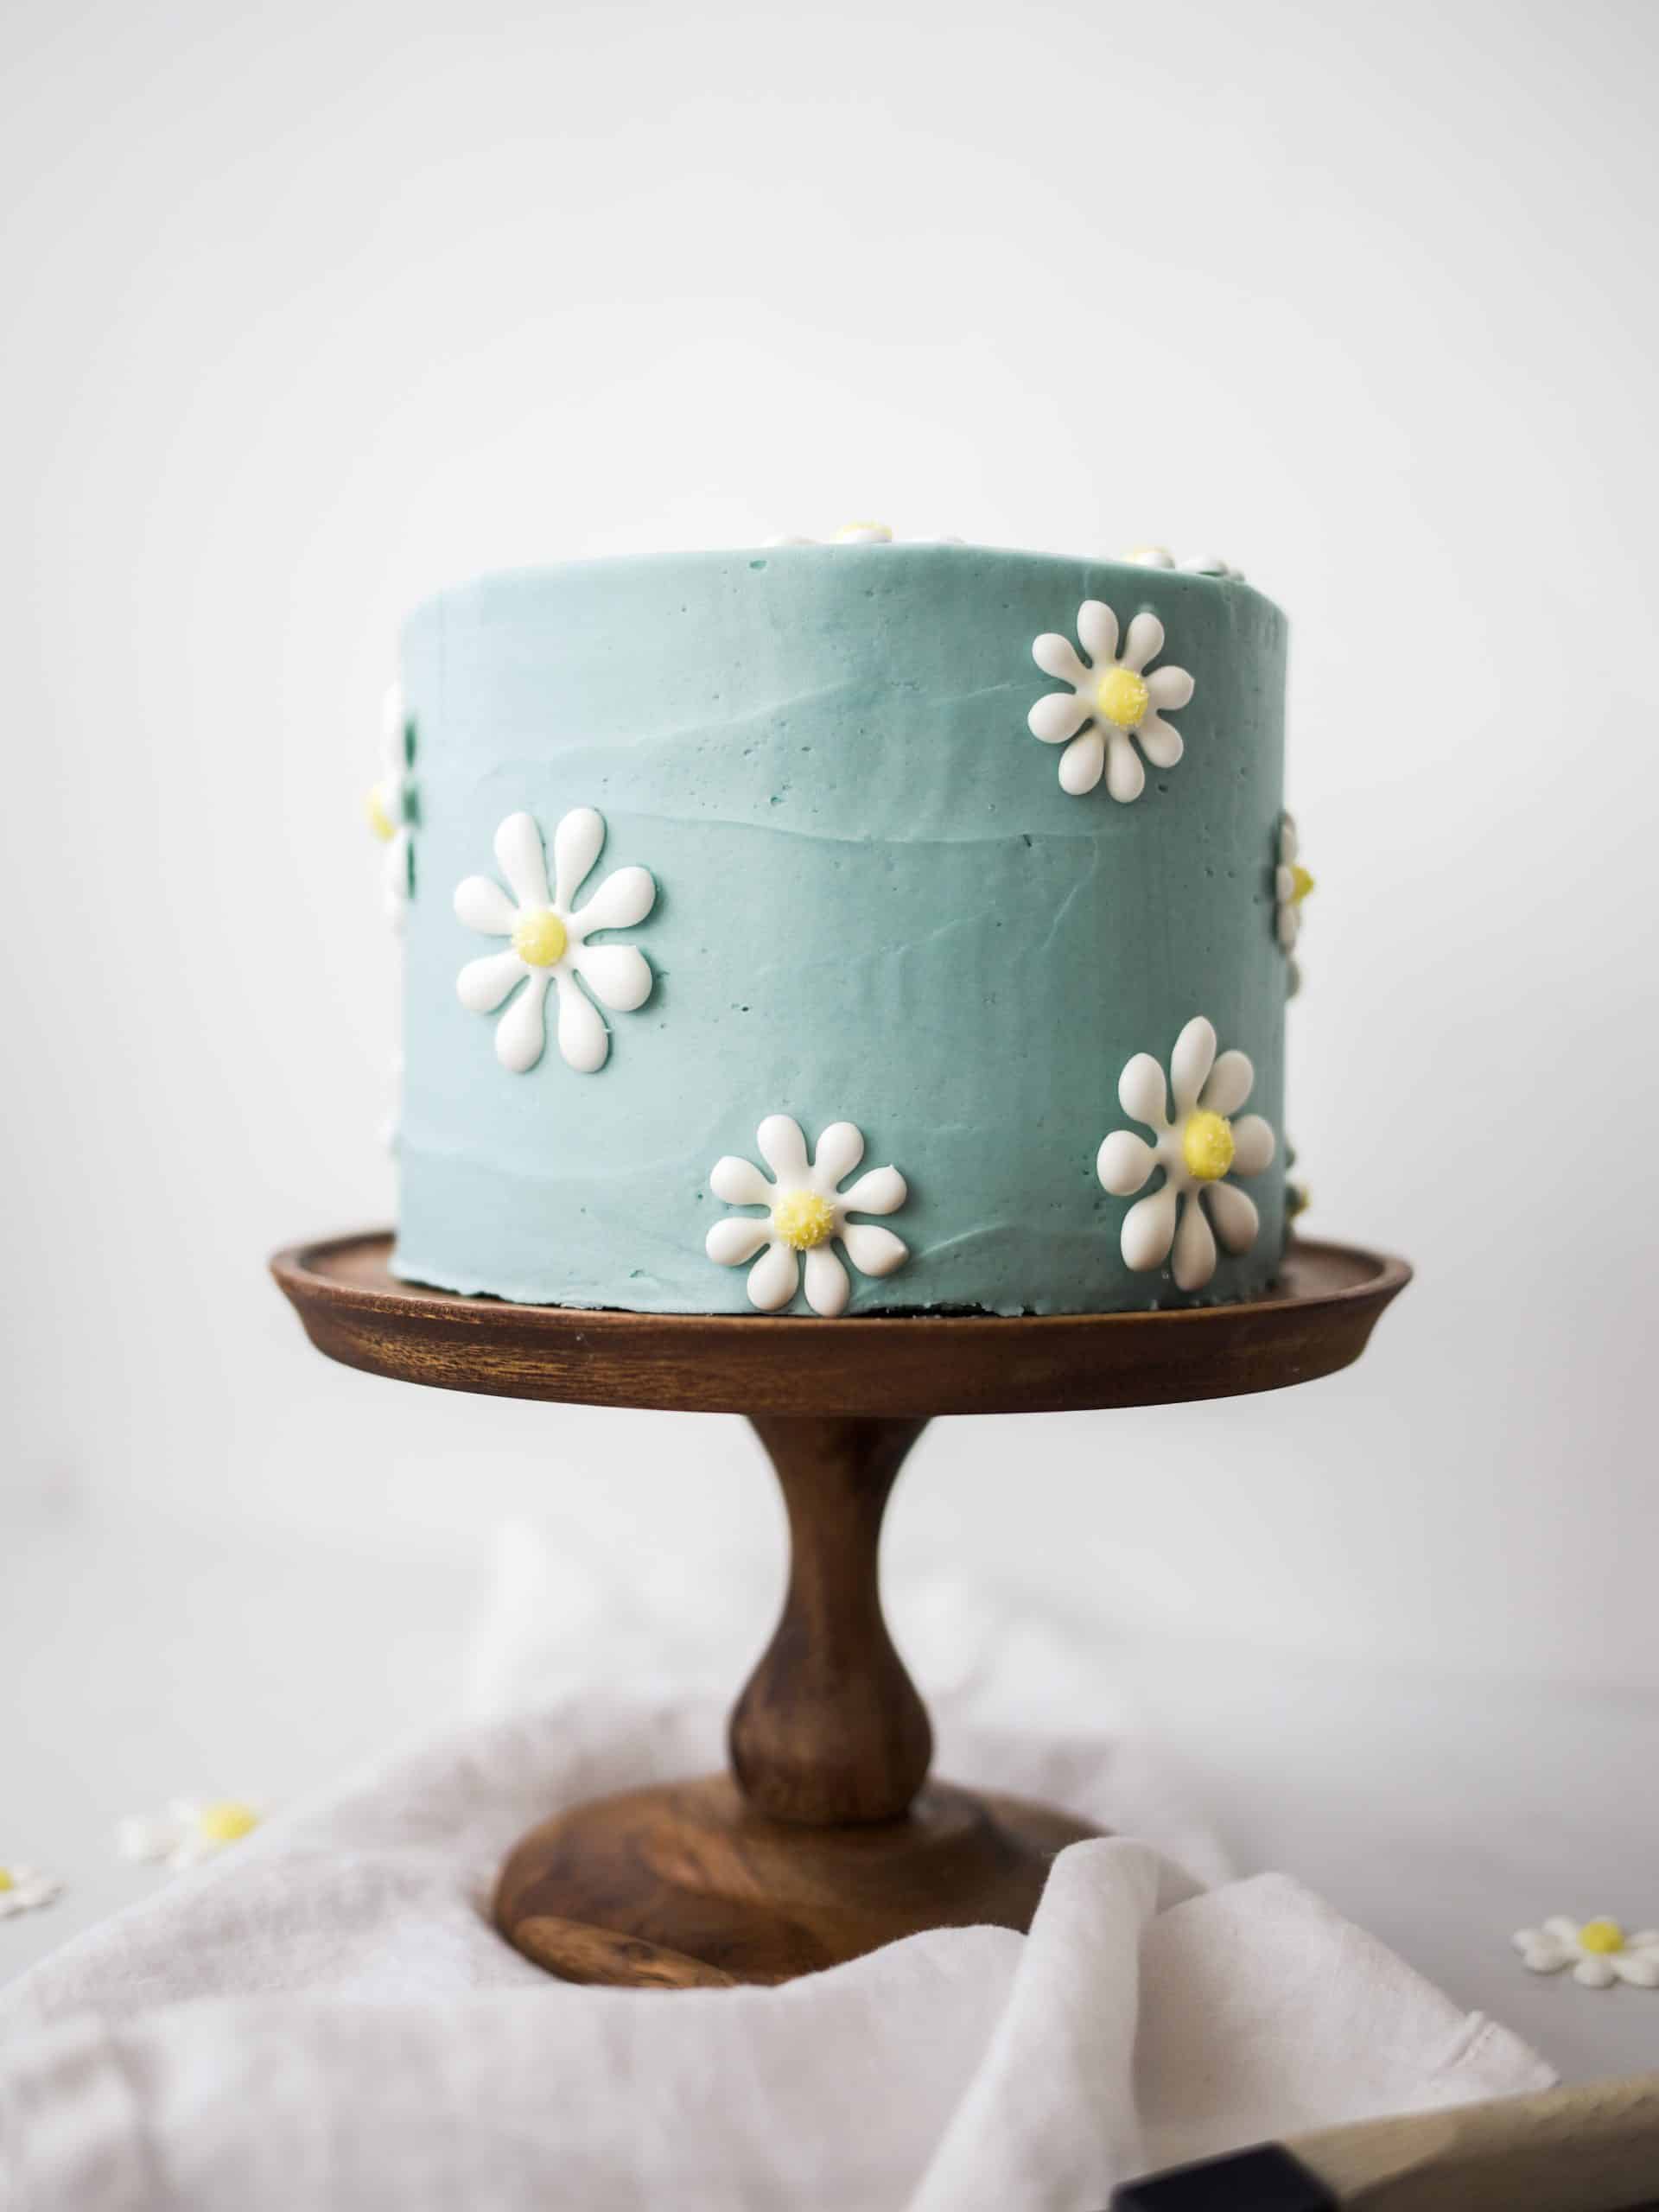
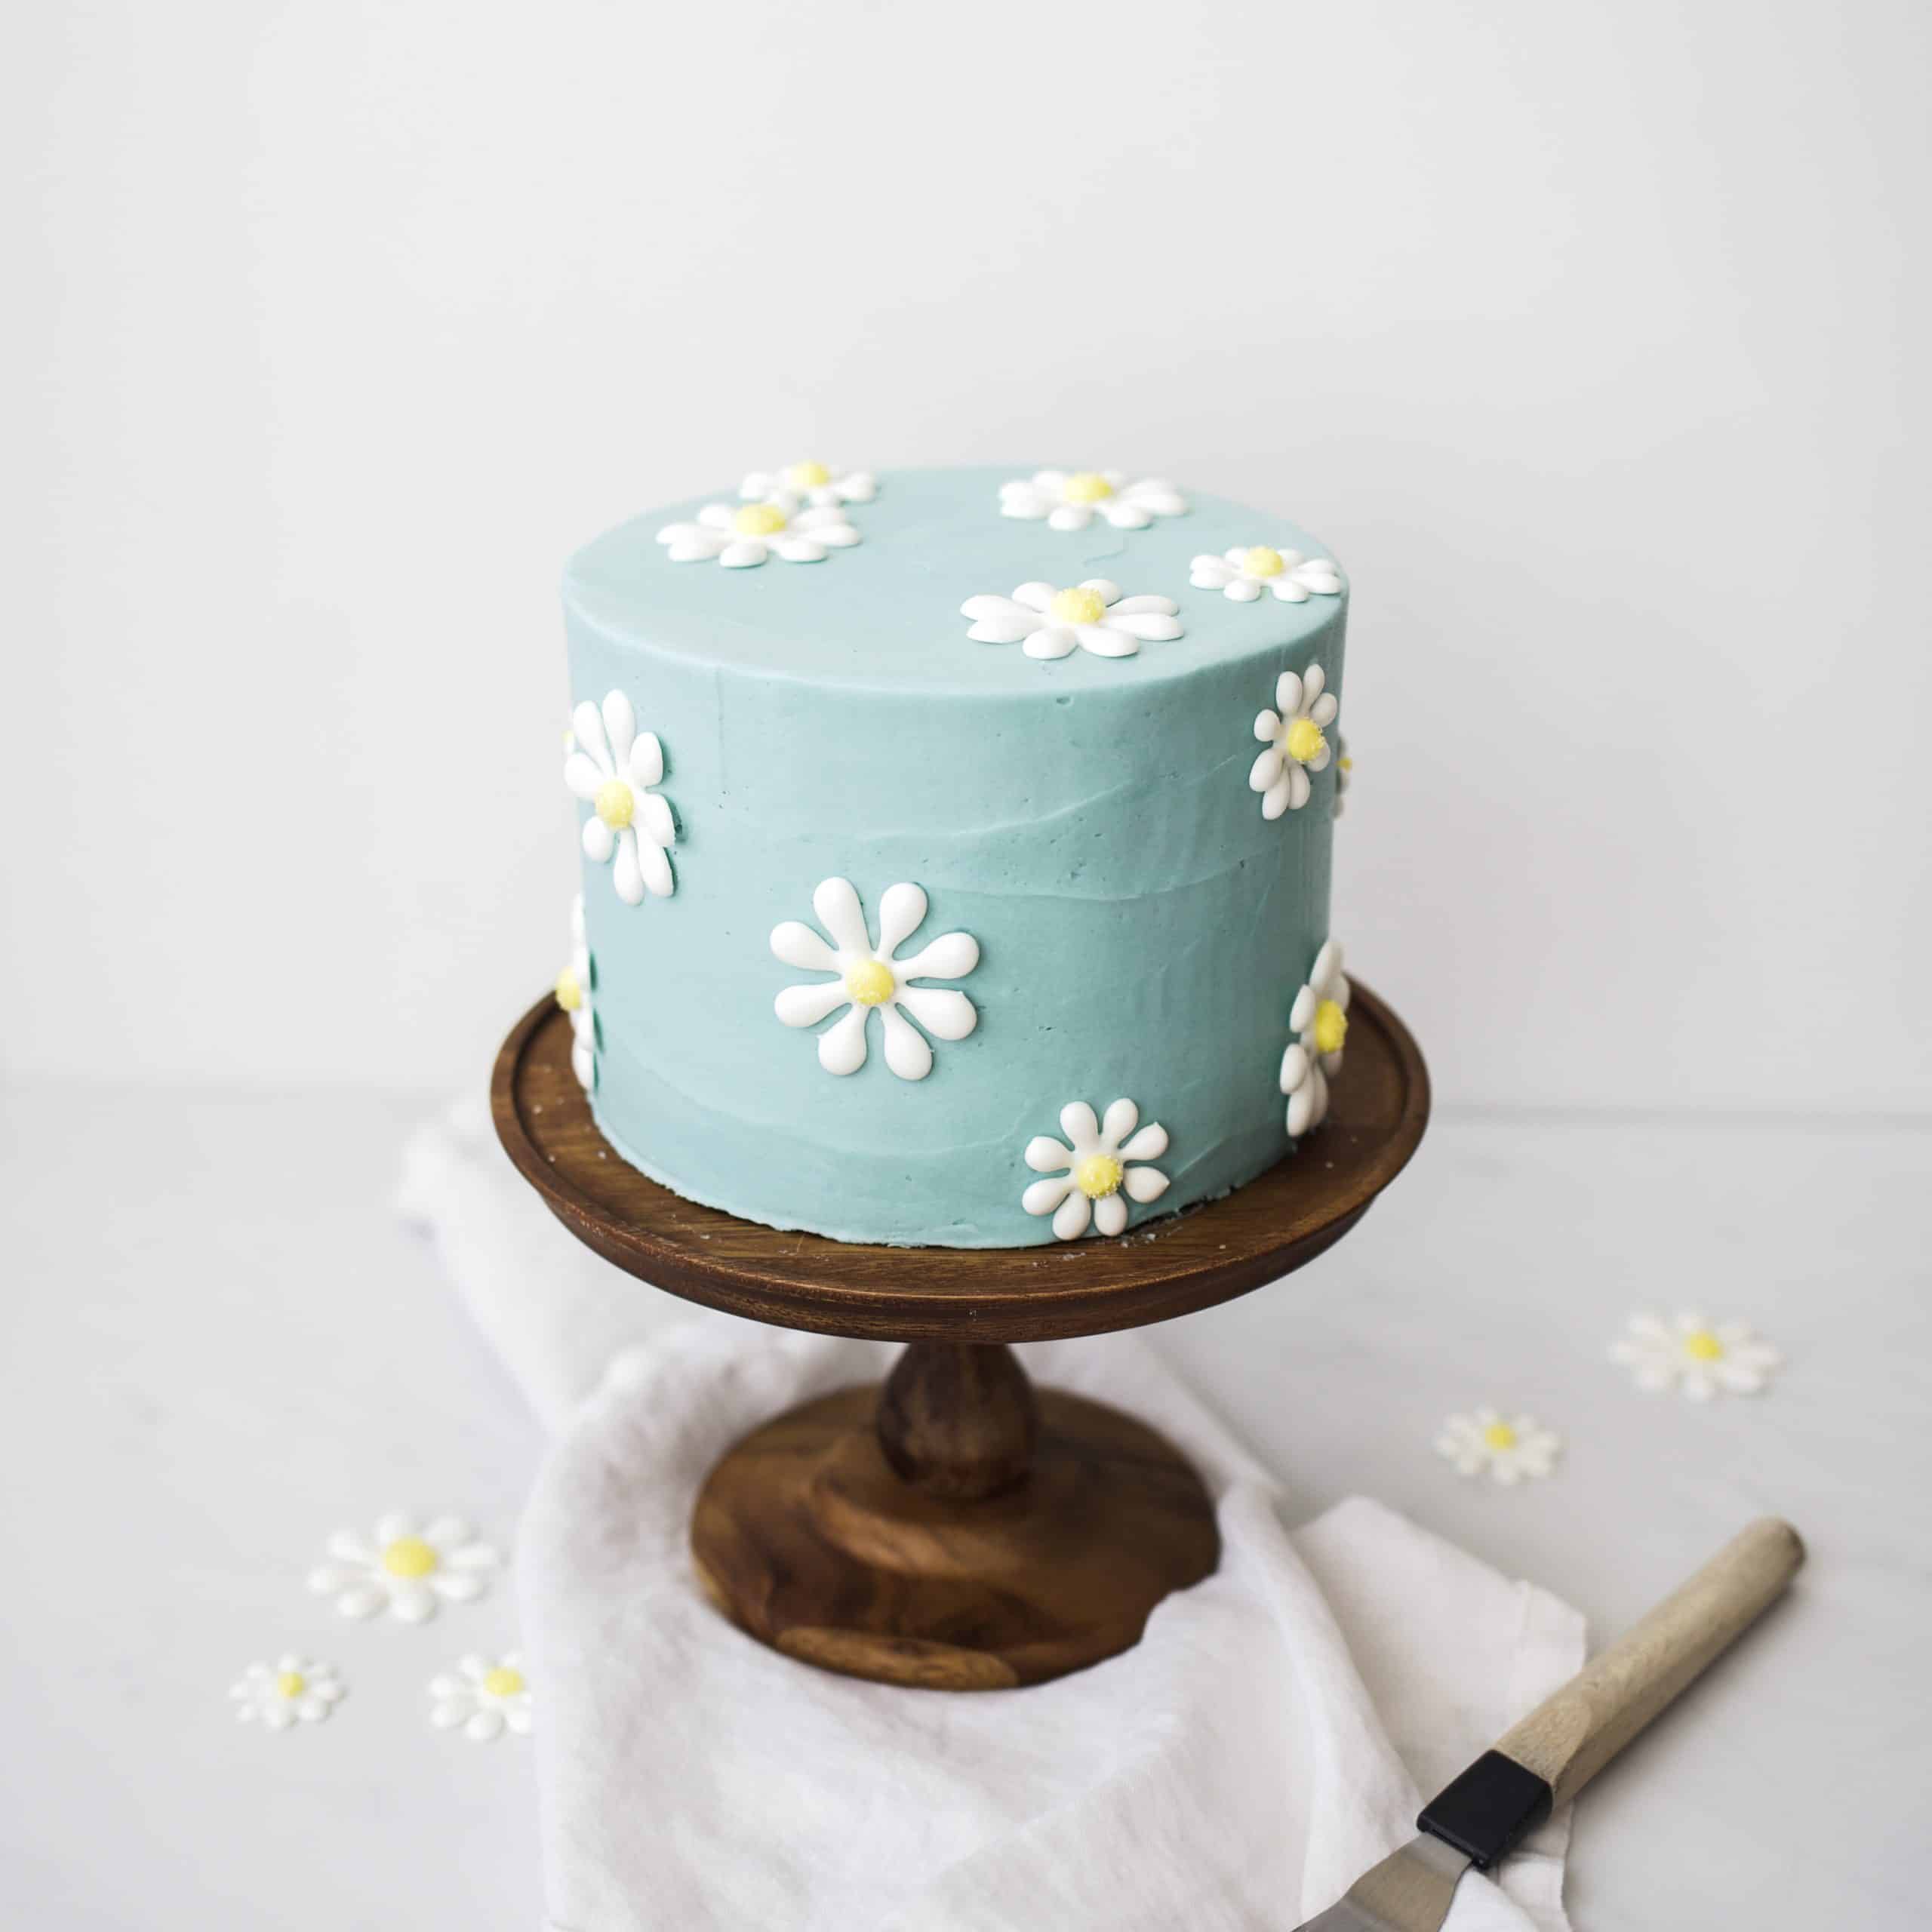
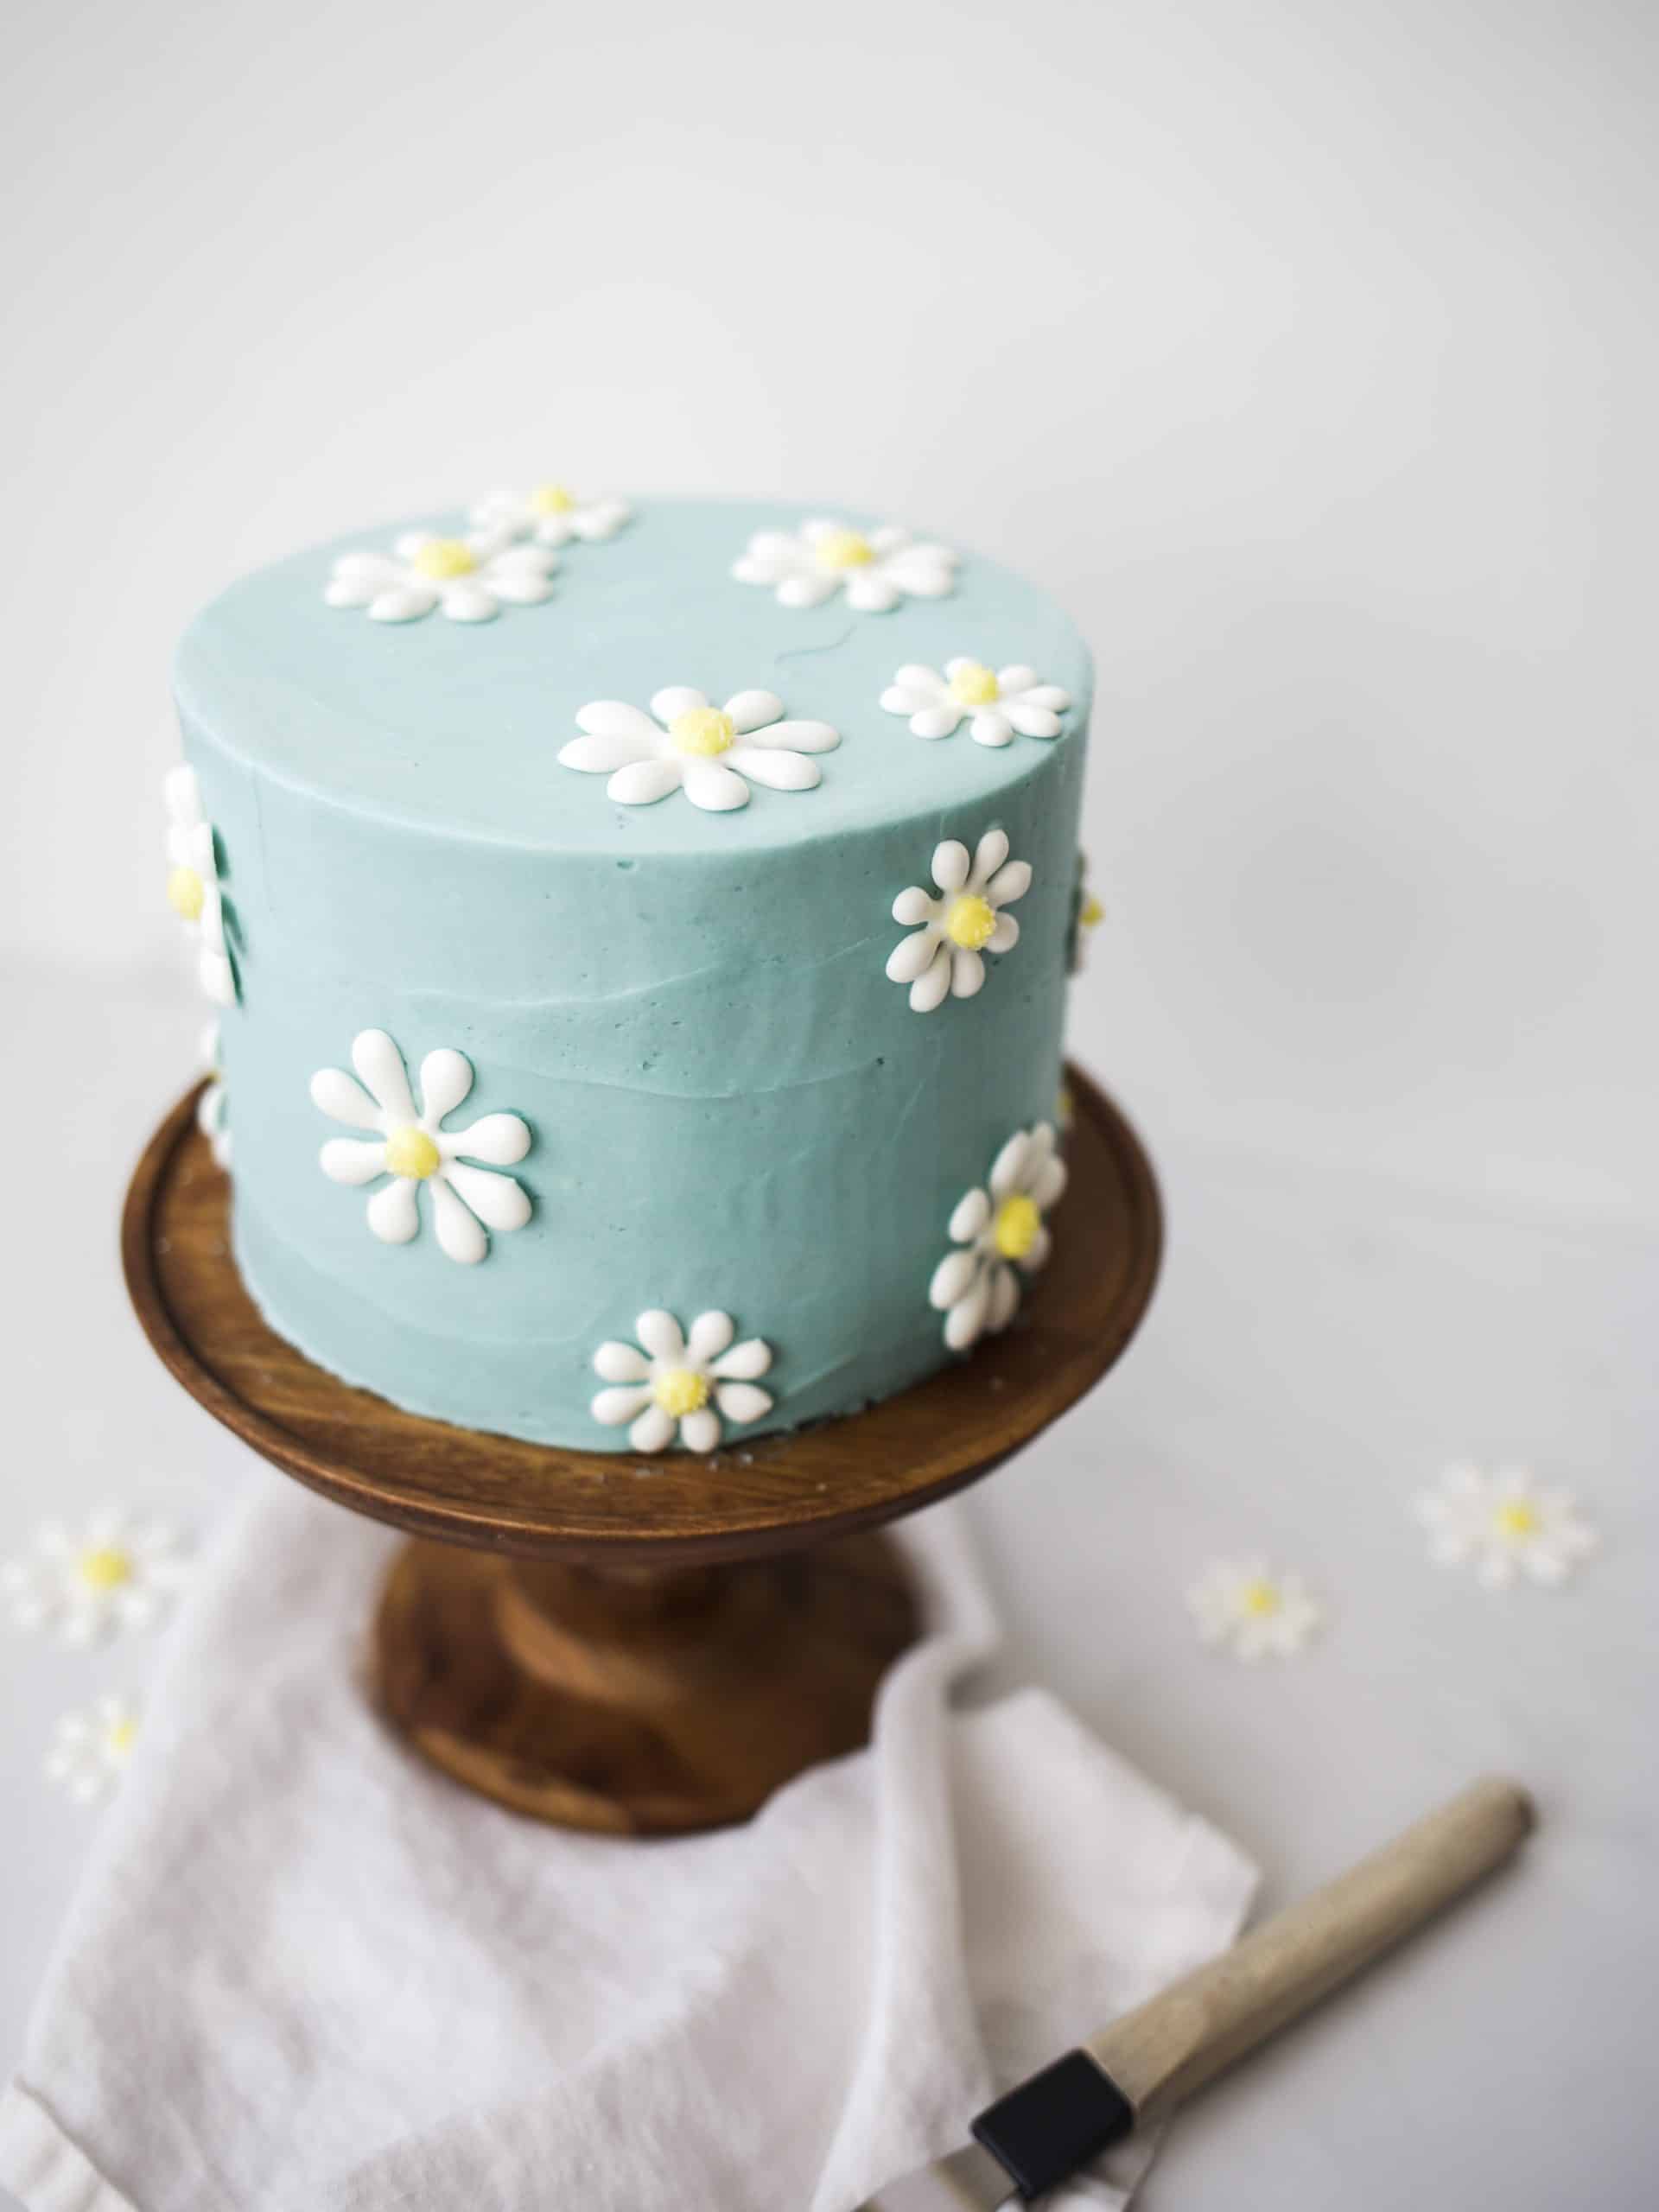
I’ll be honest: cake decorating is really not my thing. Although I love the creativity of putting together something that is equal parts tasty and beautiful, there are some people who are cut out for highly detailed desserts and pastries, and there are some who, well, are just not. I fall into that latter category. But since I’ve somehow made a career slinging recipes and photos of cookies, pies, and breads like I know what I’m doing, I thought that I would fill you in on one of my favorite dessert tricks: royal icing transfers. If you, like me, find most forms of cake decorating a bit daunting, keep reading while I show you how I made this daisy cake and how you can use royal icing to transform any little baked good you want.
What is a Royal Icing Transfer?
We’ve not spent much time discussing royal icing here, mostly because I typically opt for a thickly piped cookie glaze in lieu of royal icing, but there are actually a whole bunch of other jobs that royal icing performs well at. Gingerbread houses, homemade sprinkles, and sugar flowers would be nothing without royal icing, and today I’m going to show you how you can transfer piped icing designs from sheets of wax paper directly to a cake. A royal icing transfer is royal icing that has been applied to a sheet of wax paper, allowed to dry, and then carefully peeled off and transferred to a baked good. Because royal icing dries hard, perfectly piped designs can be picked up and placed onto any baked treat bearing a sticky surface: freshly frosted cakes, still-wet cookies, and swirled cupcakes.
Why Use a Royal Icing Transfer?
Although many people more proficient with a piping bag and tip might be able to decorate cakes, cookies, and confections freehand, some of us (raises hand) don’t have as much confidence in their own artistic designs. Instead, I like to print off shapes and letters onto sheets of printer paper, tracing the ink on top of a sheet of wax paper. This means I basically get to use a stencil and allow the icing to dry prior to transferring it to my cake or cookie. Using a royal icing transfer means I don’t worry about mess ups, shaky hands, or smudges, because I can create as many shapes as I want, only using the ones that turn out the way I wanted.


How to Create a Royal Icing Transfer:
Meringue Powder Royal Icing
Royal icing can be prepared in a number of ways, but my preferred method is made with meringue powder. Meringue powder can be found at craft stores or purchased online, and when combined with water and powdered sugar, it makes a glossy icing that can be thickened and piped.
Making It
To make royal icing, we simply combine powdered sugar, meringue powder, and water in a large bowl with a hand mixer. Stir until the mixture thickens slightly, leaving traces of the beater behind in the icing. For the purpose of piped designs, I like to test the viscosity of the icing by dragging a knife or spoon through the mixture; the icing will separate and slowly pool back together, all trace of the knife or spoon barely disappearing within 10-12 seconds. For more detailed designs, you may prefer a slightly thicker icing, so feel free to thicken it up by adding a few additional tablespoons of powdered sugar.
Spoon a small bit of the icing into a piping bag fitted with a piping tip and test out your design. Thicken (using powdered sugar) or thin (using just a few teaspoons of water) the icing as desired, and remember that thin icing will spread out and take longer to dry. Once your icing is the right consistency, you can modify its color using food coloring. I always recommend gel food coloring (I buy this kind!), and remember- a little goes a long way! Whisk in any gel coloring you prefer and allow the icing to rest for about 2 minutes to allow any bubbles to come to the surface the bowl. In the meantime, prepare your stencil.
Piping It
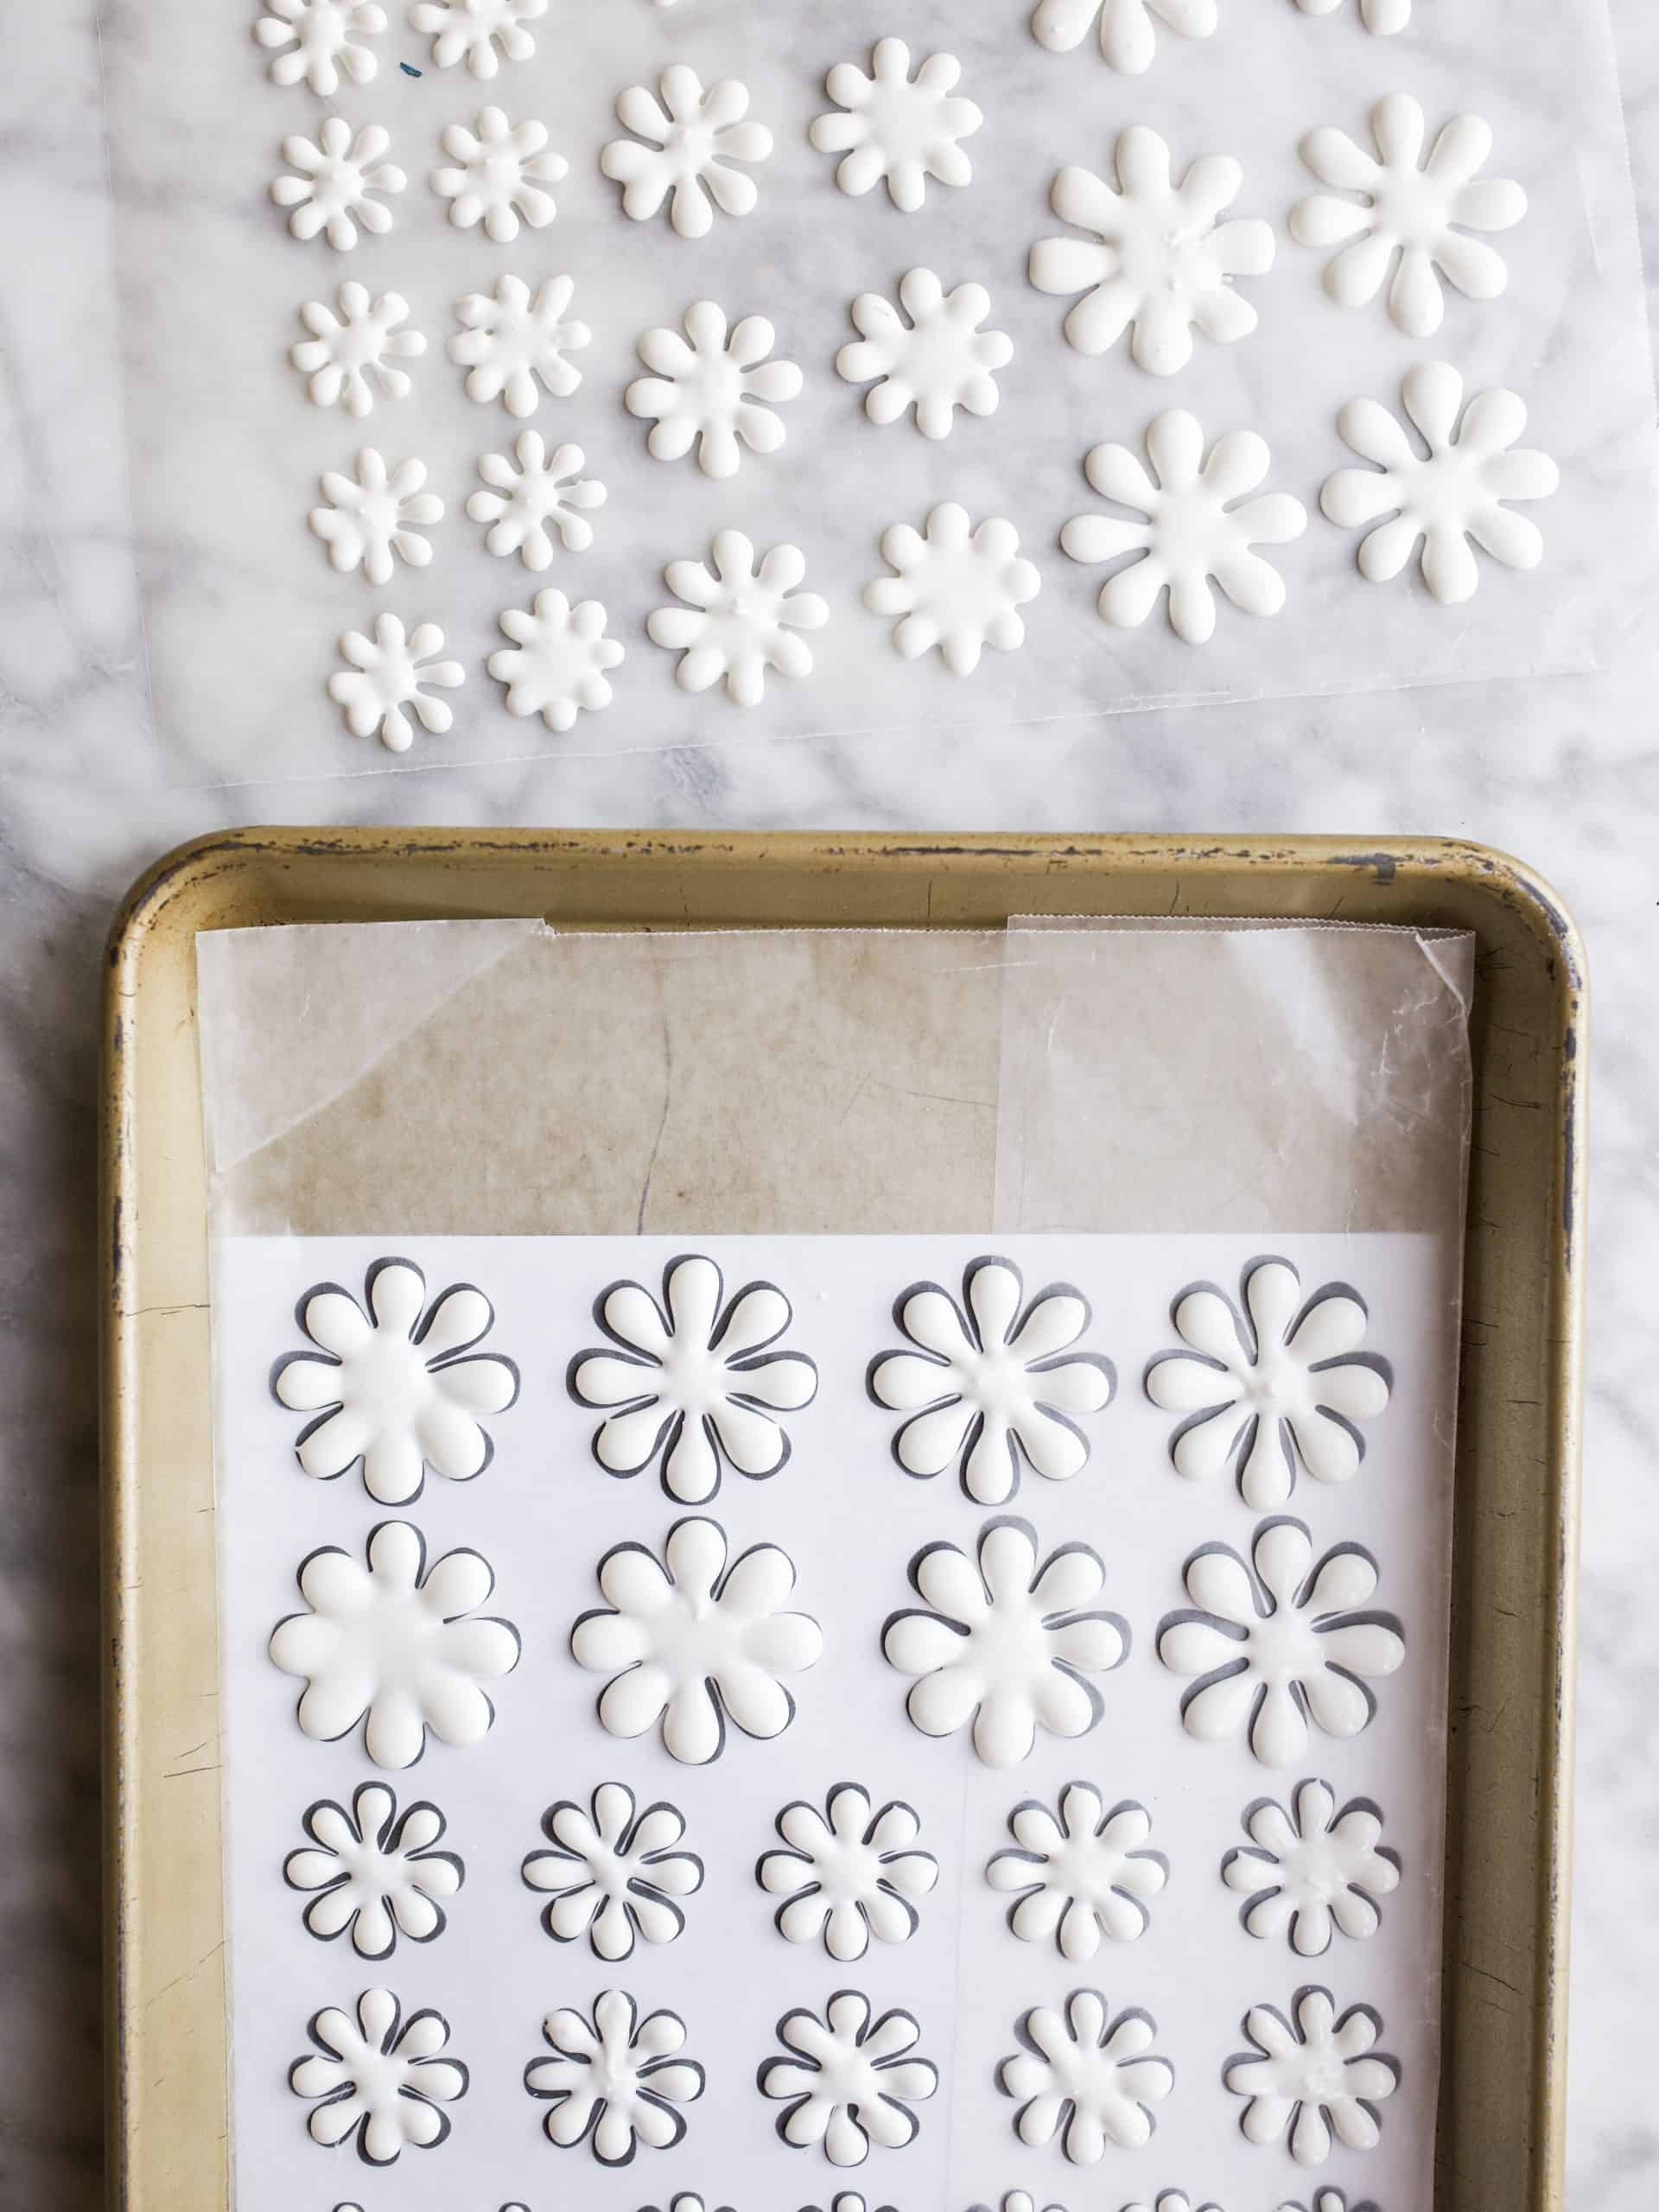
For royal icing transfers, I like to print my designs onto a piece of computer paper and then layer it onto a rimmed sheet pan with a piece of wax paper on top. Online programs like Canva make creating stencils a cinch. Keep in mind that many royal icing designs with two or more colors will need some dry time in between layers- don’t rush the process unless you’re fine with smeared designs.
When you’re ready to being, slowly apply pressure to the piping bags, tracing your stencil and filling in your design where needed. I like to use a food safe paint brush (that has never touched paint!) to move the icing around and fill in any borders, but you could also use a toothpick as well. Once finished, allow the designs to dry completely, usually 24 hours, before carefully peeling them off the wax paper and applying them to the surface of the baked good.
Troubleshooting Royal Icing Transfers
- If your design is sticking to the wax paper, the underside may not be dry.
- Designs that are too thin may break when peeling. Be sure to create plenty of extras just in case you experience breakage.
- For easy peeling, consider piping designs directly onto their own little piece of wax paper. I typically avoid the extra work involved with this, but it does make the transfer easier.
- Add any sprinkles, nonpareils, or colored sugar to the royal icing while wet, keeping in mind that thick royal icing will for a dried shell pretty quickly.
- Use a toothpick or food-safe paintbrush to gently nudge any icing around on your design while wet.
- Always use gel food coloring to dye royal icing.
- Royal icing transfers will not stick to hardened surfaces! Be sure to apply designs while the surface of the cake, cookie, or confection is still sticky or wet.
- If the surface you intend to apply your royal icing transfer to is no longer wet or sticky, you can often stick it using a few dots of royal icing on the back of your design.
- If you, like me, are new to royal icing transfers, start with simple designs. The more detailed the design, the more frustrating the process will be.
- Be sure to test the viscosity of your royal icing prior to piping; thin icing will spread out way too much.
- Allow royal icing to dry at room temperature- not in the fridge. You can expedite this process by allowing a small fan to circulate air over them.
How to Make This Happy Daisy Cake
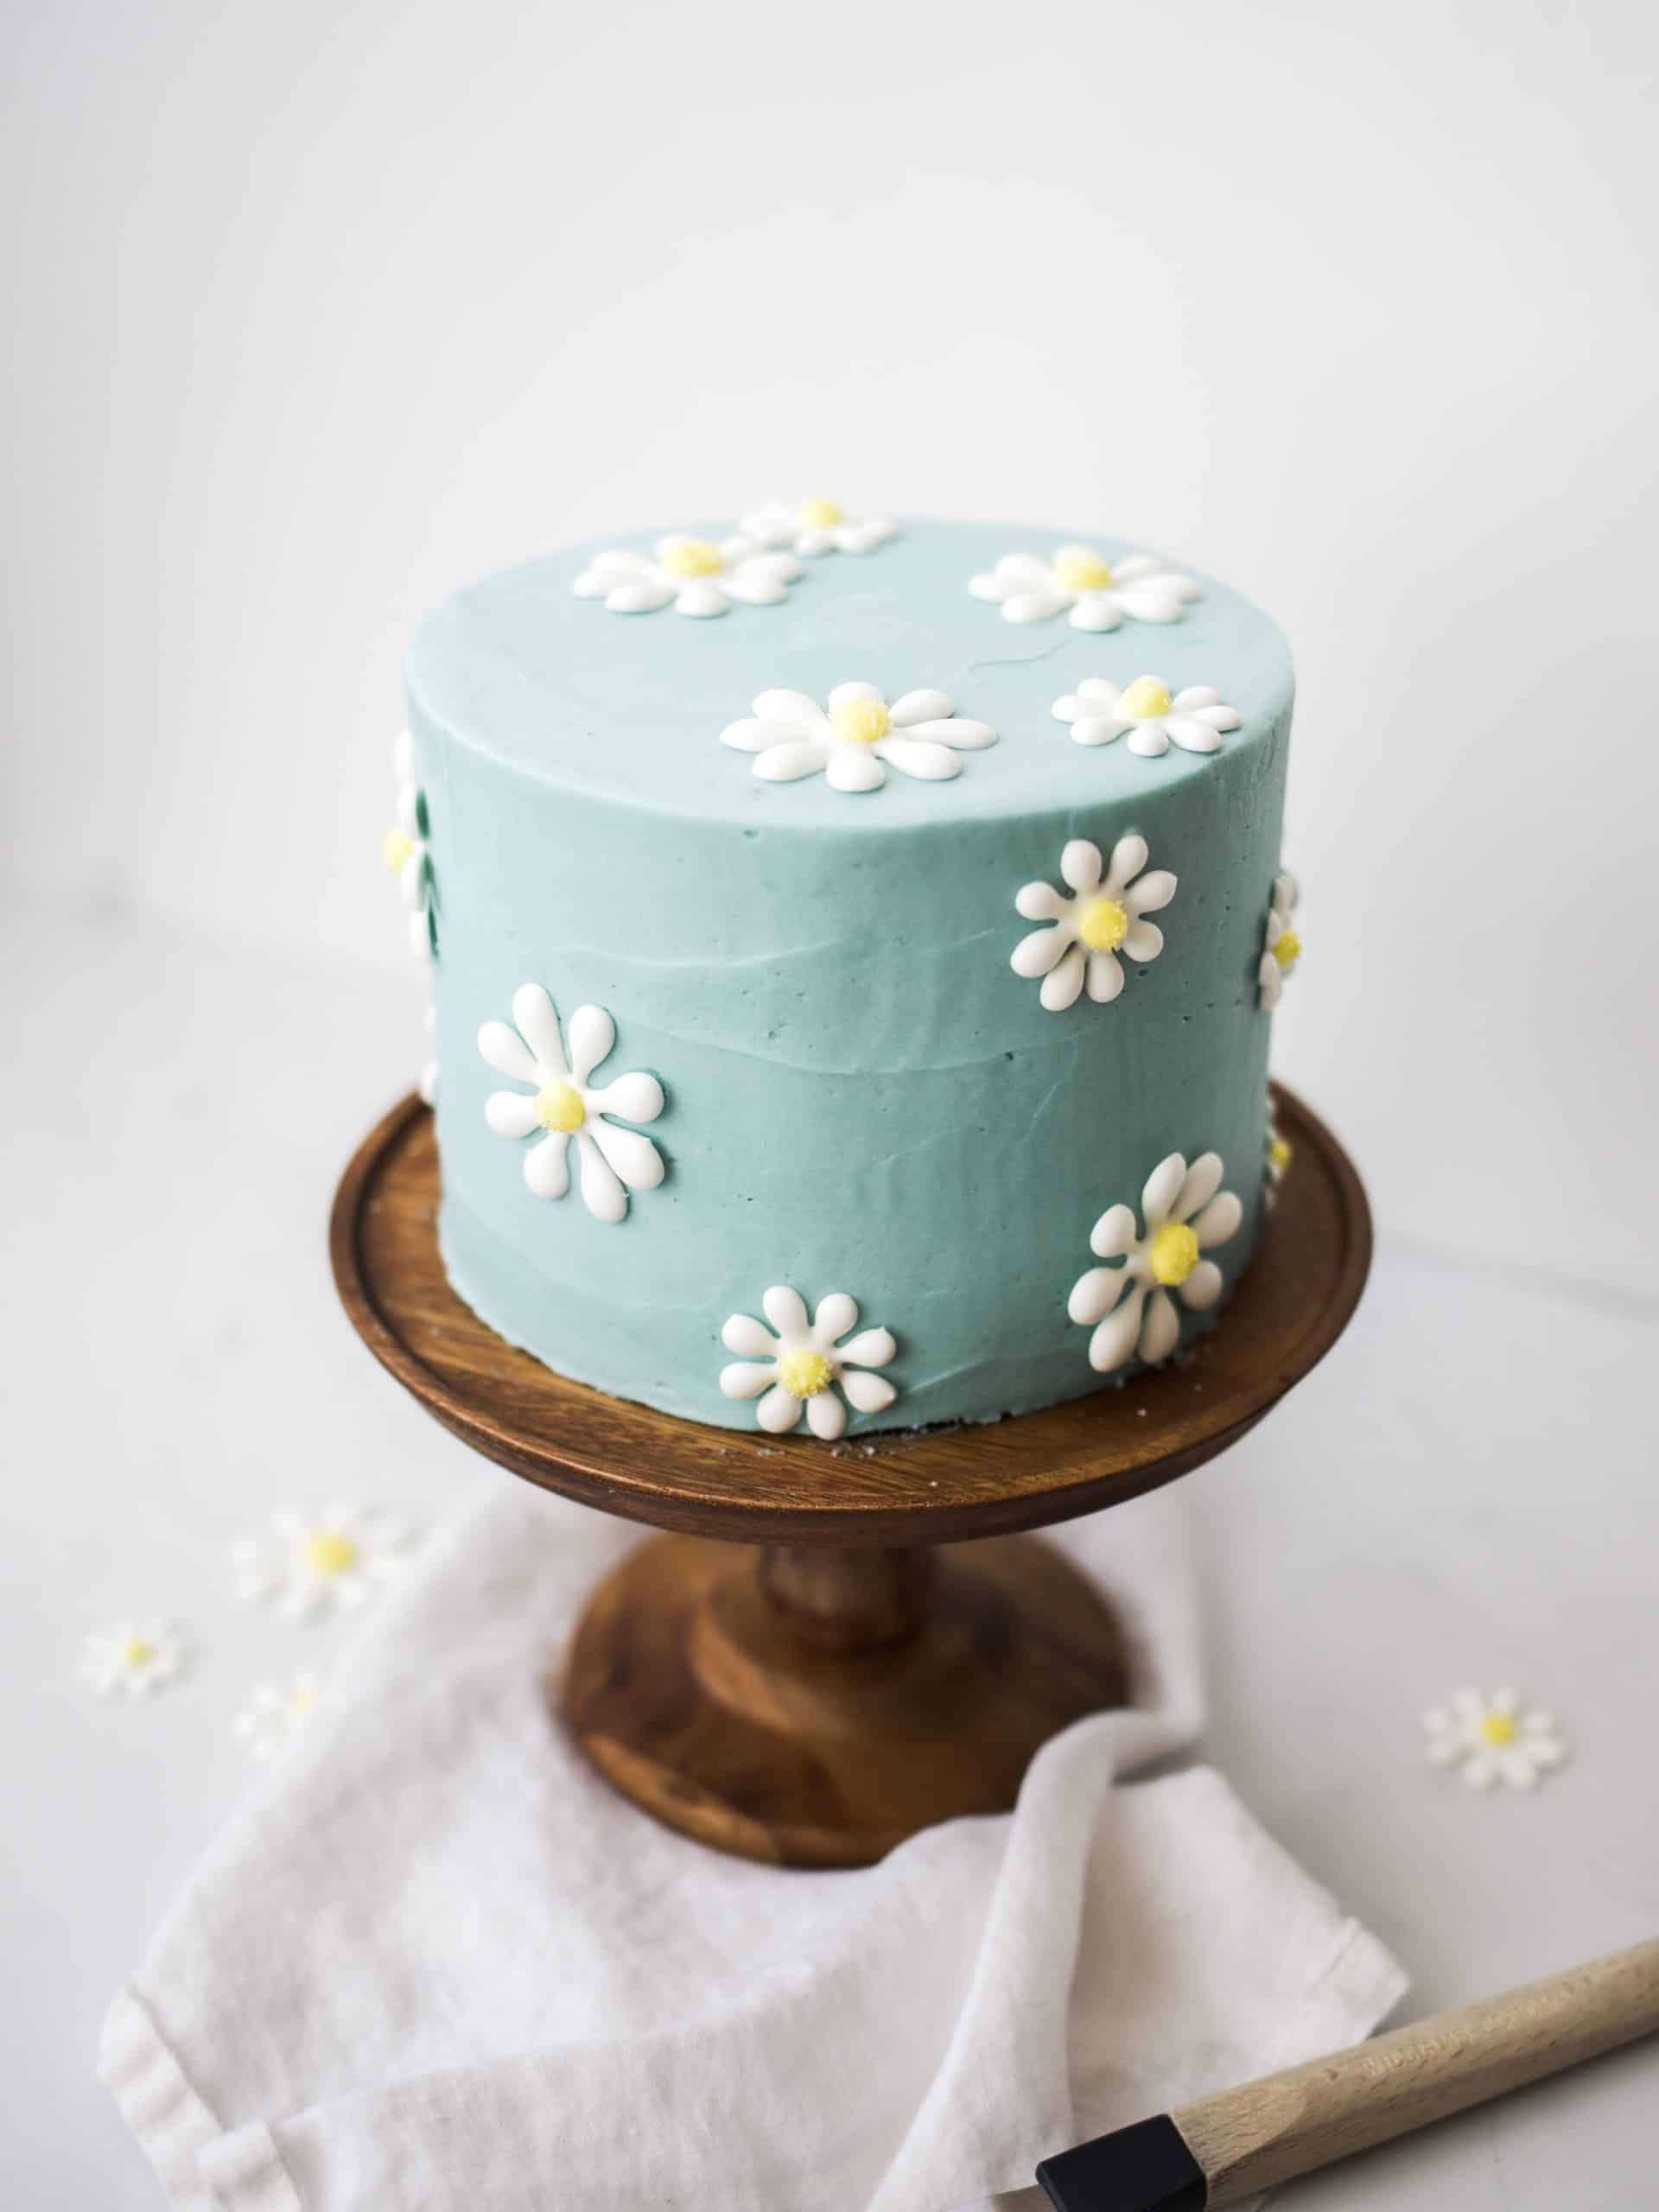
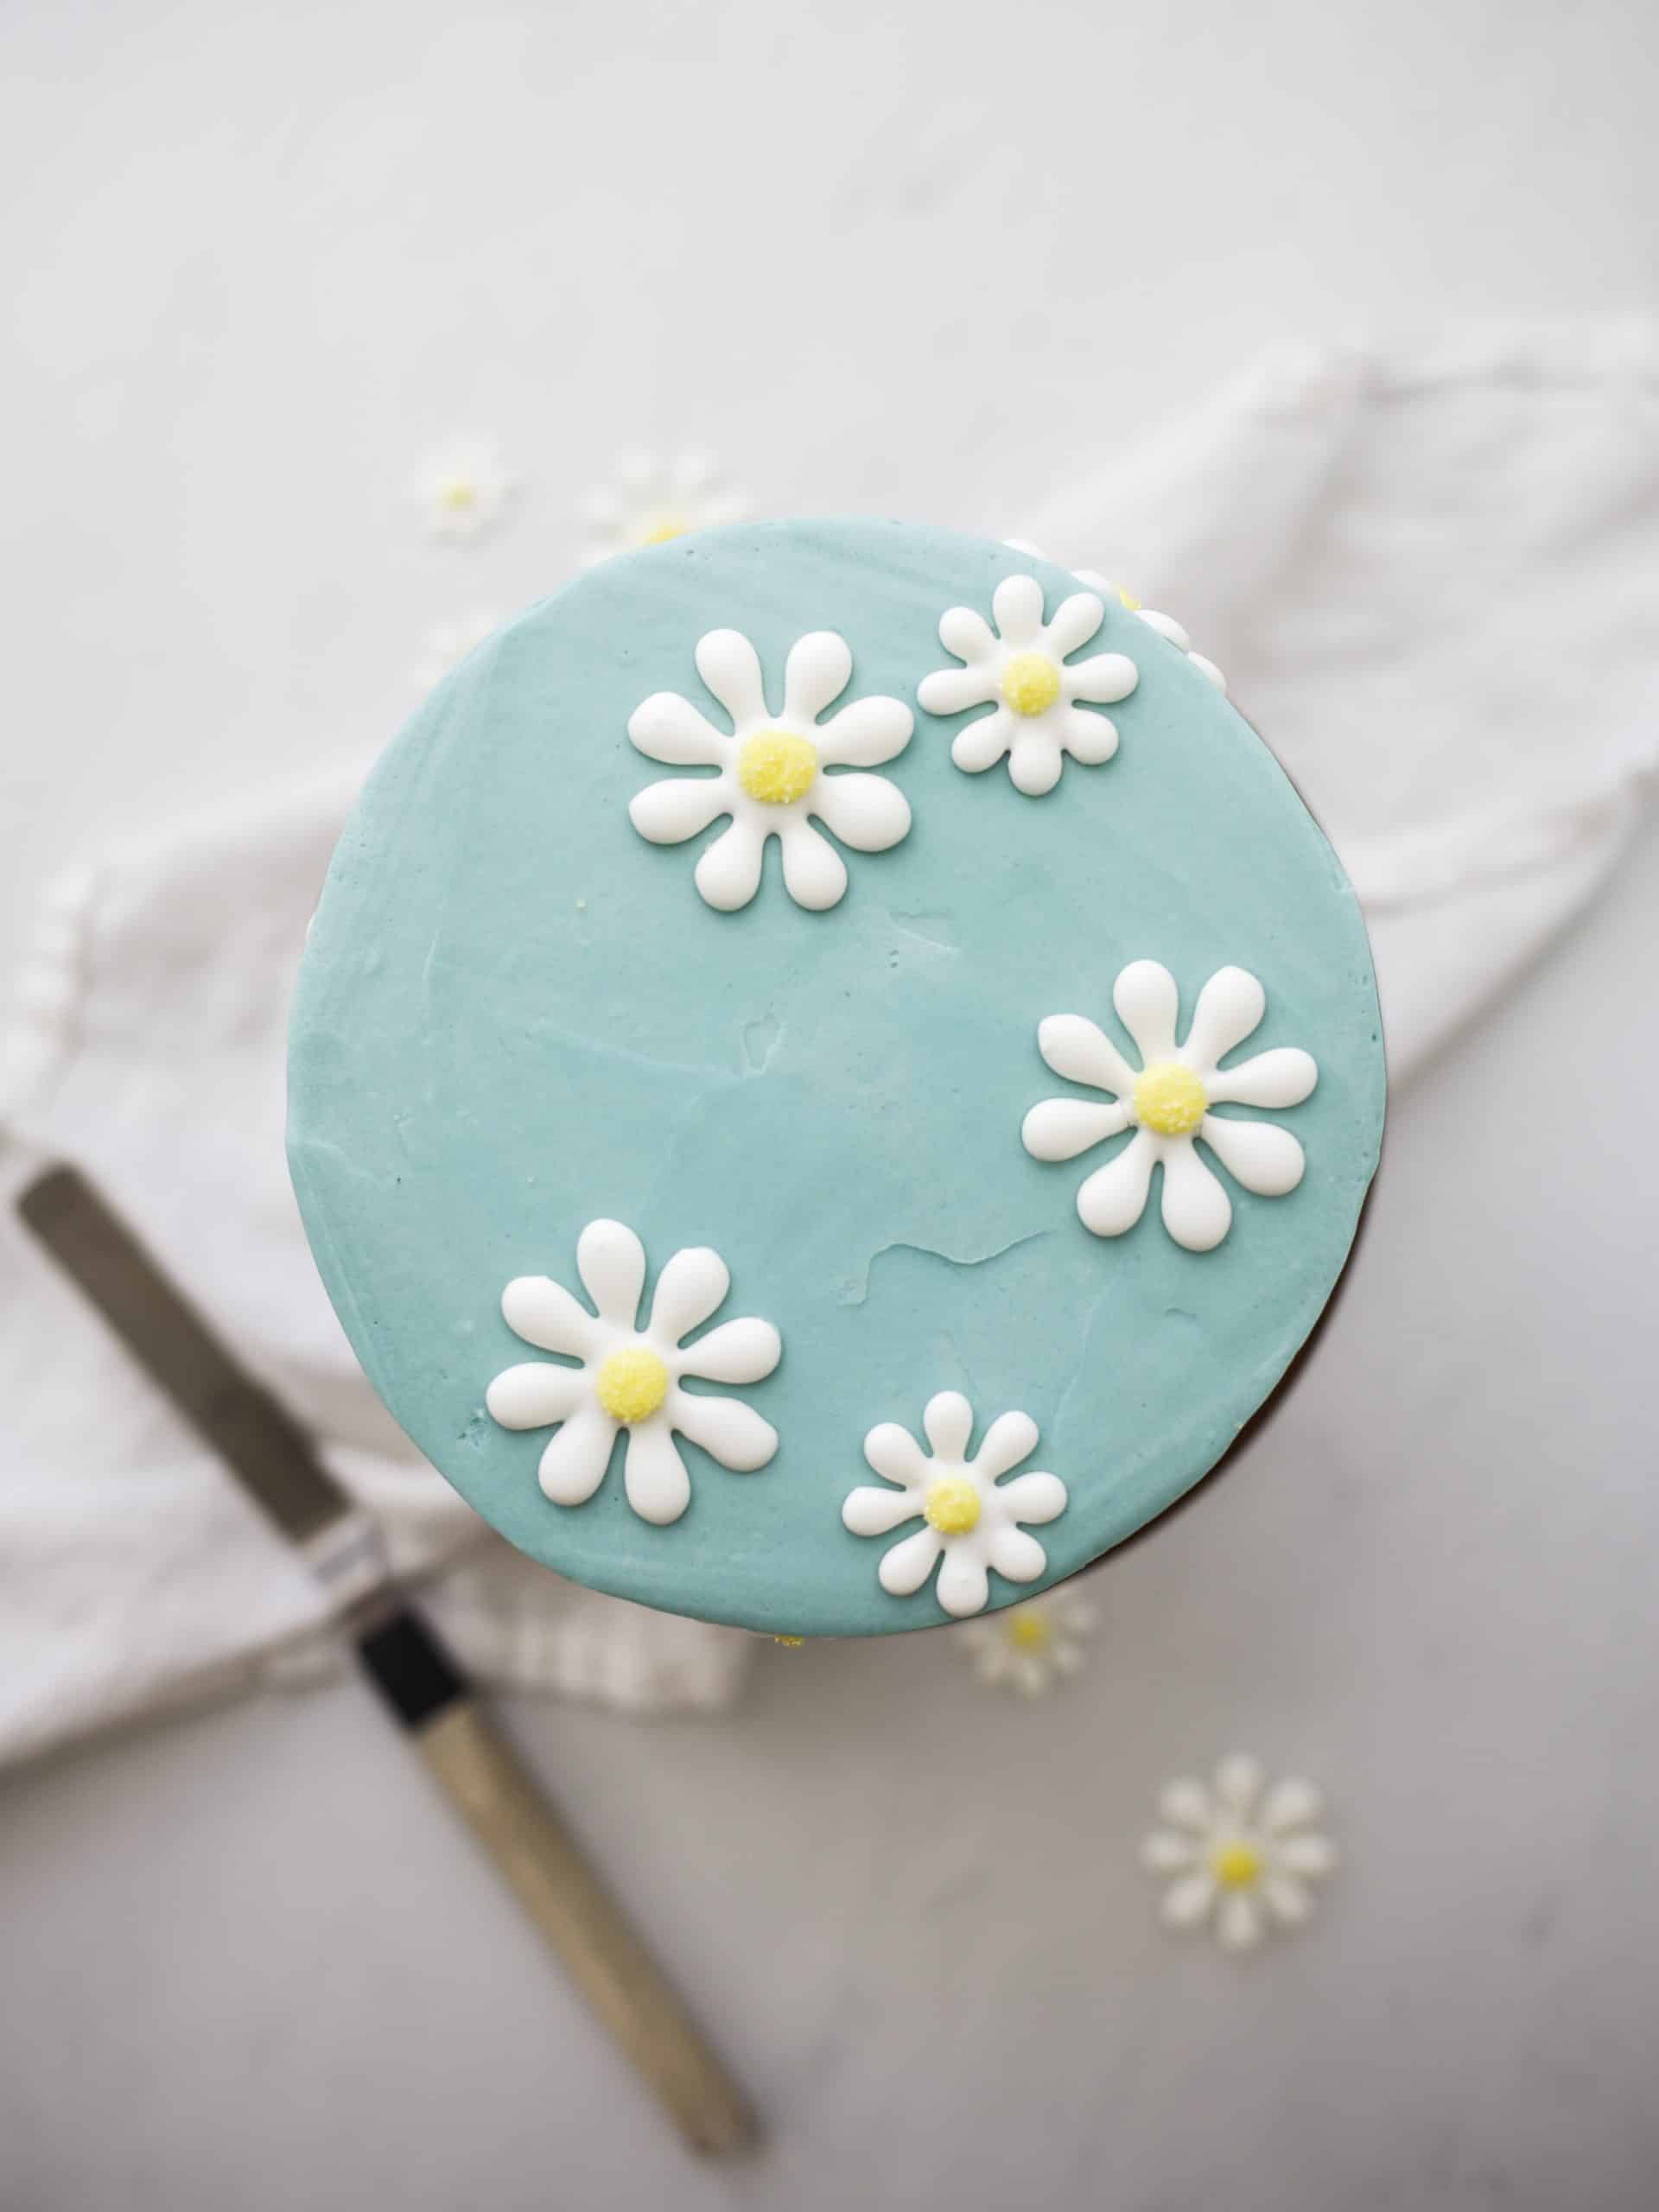
If you’ve read this whole post to see how to make this daisy cake, you’ve finally reached the right section! For this cake, I used a store-bought yellow cake mix baked in three (6″) cake pans. The cakes took about 23 minutes to bake, but just remove them from the oven when a toothpick comes out clean. While the cakes baked, I piped the first layer of the daisies (find my template here!).
First, prepare a single batch of royal icing and spoon about 2/3 of it into a prepared piping bag fitted with a #1 tip. Add a drop or two of yellow food color to the reserved 1/3 of icing, and place it in a small Tupperware or a bowl covered with a wet paper towel- this will prevent the icing from drying out. Pipe directly onto the wax paper, stenciling and filling in each flower as you go around. Remember that there is a learning curve here, and not every flower will turn out perfect. Be gentle with yourself. Allow the whites of the daisies to crust and dry, about an hour, before piping the yellow centers and sprinkling them with yellow sugar. Allow the designs to dry at room temperature overnight or 24-hours, preferably.
Once your cake layers have cooled and the daisies have dried completely, prepare the buttercream of your choice (you’ll need about 3 cups), and frost your cake. Peel off the daisies carefully and apply them directly to the sticky frosting. Leave the cake at room temperature and serve! I just think it’s super adorable and a welcome happy addition to these otherwise dreary months.

I hope you guys have learned a smidge in this tutorial and will give royal icing transfers a try! Let me know what you think and happy baking!
If you like this tutorial, you should try:
How to Make Homemade Sprinkles
Sugar Cookie Gift Tags
Meringue Cookies
Marbled Sugar Cookies
Painted Sugar Cookies
Royal Icing Recipe

This simple royal icing is made with meringue powder and can be used to make royal icing transfers!
- Prep Time: 5
- Total Time: 5 minutes
- Yield: 1-1/2 cups
- Category: Dessert
Ingredients
- 2 cups powdered sugar
- 1–1/2 tablespoons meringue powder
- 1/4 cup room temperature water
Instructions
- Combine all three ingredients in a large bowl and use a hand mixer to blend together on medium speed until glossy and slightly thickened, about 1-2 minutes. Add additional water a teaspoon at a time to thin out or add additional powdered sugar a tablespoon at a time to thicken up. Stir until combined.
Notes
- See directions in text above for achieving the appropriate viscosity royal icing for piping,


3 thoughts on “A Happy Daisy Cake (and a Royal Icing Transfer Tutorial!)”
Thank you for sharing a fun recipe. I have never conquered baking cakes..but never say never‼️
★★★★★
Kate, you have no idea how perfect this timing is! My daughters birthday is in a few weeks and she has requested a “flower party” and since daisies are a favorite of mine, that’s the main theme of the party I’m throwing for her. I always make her birthday cakes and when I did my initial hunt for the perfect recipe I came to your blog first but didn’t see the flower cake I was envisioning but this morning I opened my inbox and the daisy cake of my birthday dreams was waiting for me! Can’t wait to try this one. I’ll let you know how it comes out!
★★★★★
I love this idea. I also fall into the category of not gifted with a piping bag! Can’t wait to try this. Such fantastic step by step instructions.